Like any B2B organization, effective client management is essential for running a successful web development agency. Doing the job right – like building a website that reflects your client’s unique needs – relies on tools and processes that keep them informed, while streamlining communication and feedback. The right setup ensures clients can suggest changes, request new features, and track progress - all while reducing the gap between what they expect and what you deliver.
But it’s not just about one client - it’s about all of them. Without powerful systems for project tracking, team management, and client reporting, things invariably slip through the cracks and clients feel neglected. To balance these essential needs, you need a framework that provides clarity at both levels: Detailed visibility for each individual client, and consolidated oversight across all clients. That’s where ClickUp, with its flexibility and powerful features, comes in. Below, we’ll explore how to build a complete client management system inside ClickUp.
Optimizing ClickUp Architecture for Client Management
ClickUp's hierarchy is the backbone of your agency setup. It lets you group work into Spaces, Folders, and Lists - making it possible to separate business areas, dedicated work zones, and detailed processes. This ability to organize and silo information is what forms the core architecture of your workspace.
When it comes to building out your organization in ClickUp, the world is your oyster. The highly customizable tool gives you the freedom to break things down as you see fit. With this freedom, comes the need for clear guidelines that serve as guardrails, ensuring you create a structure that works for your organization
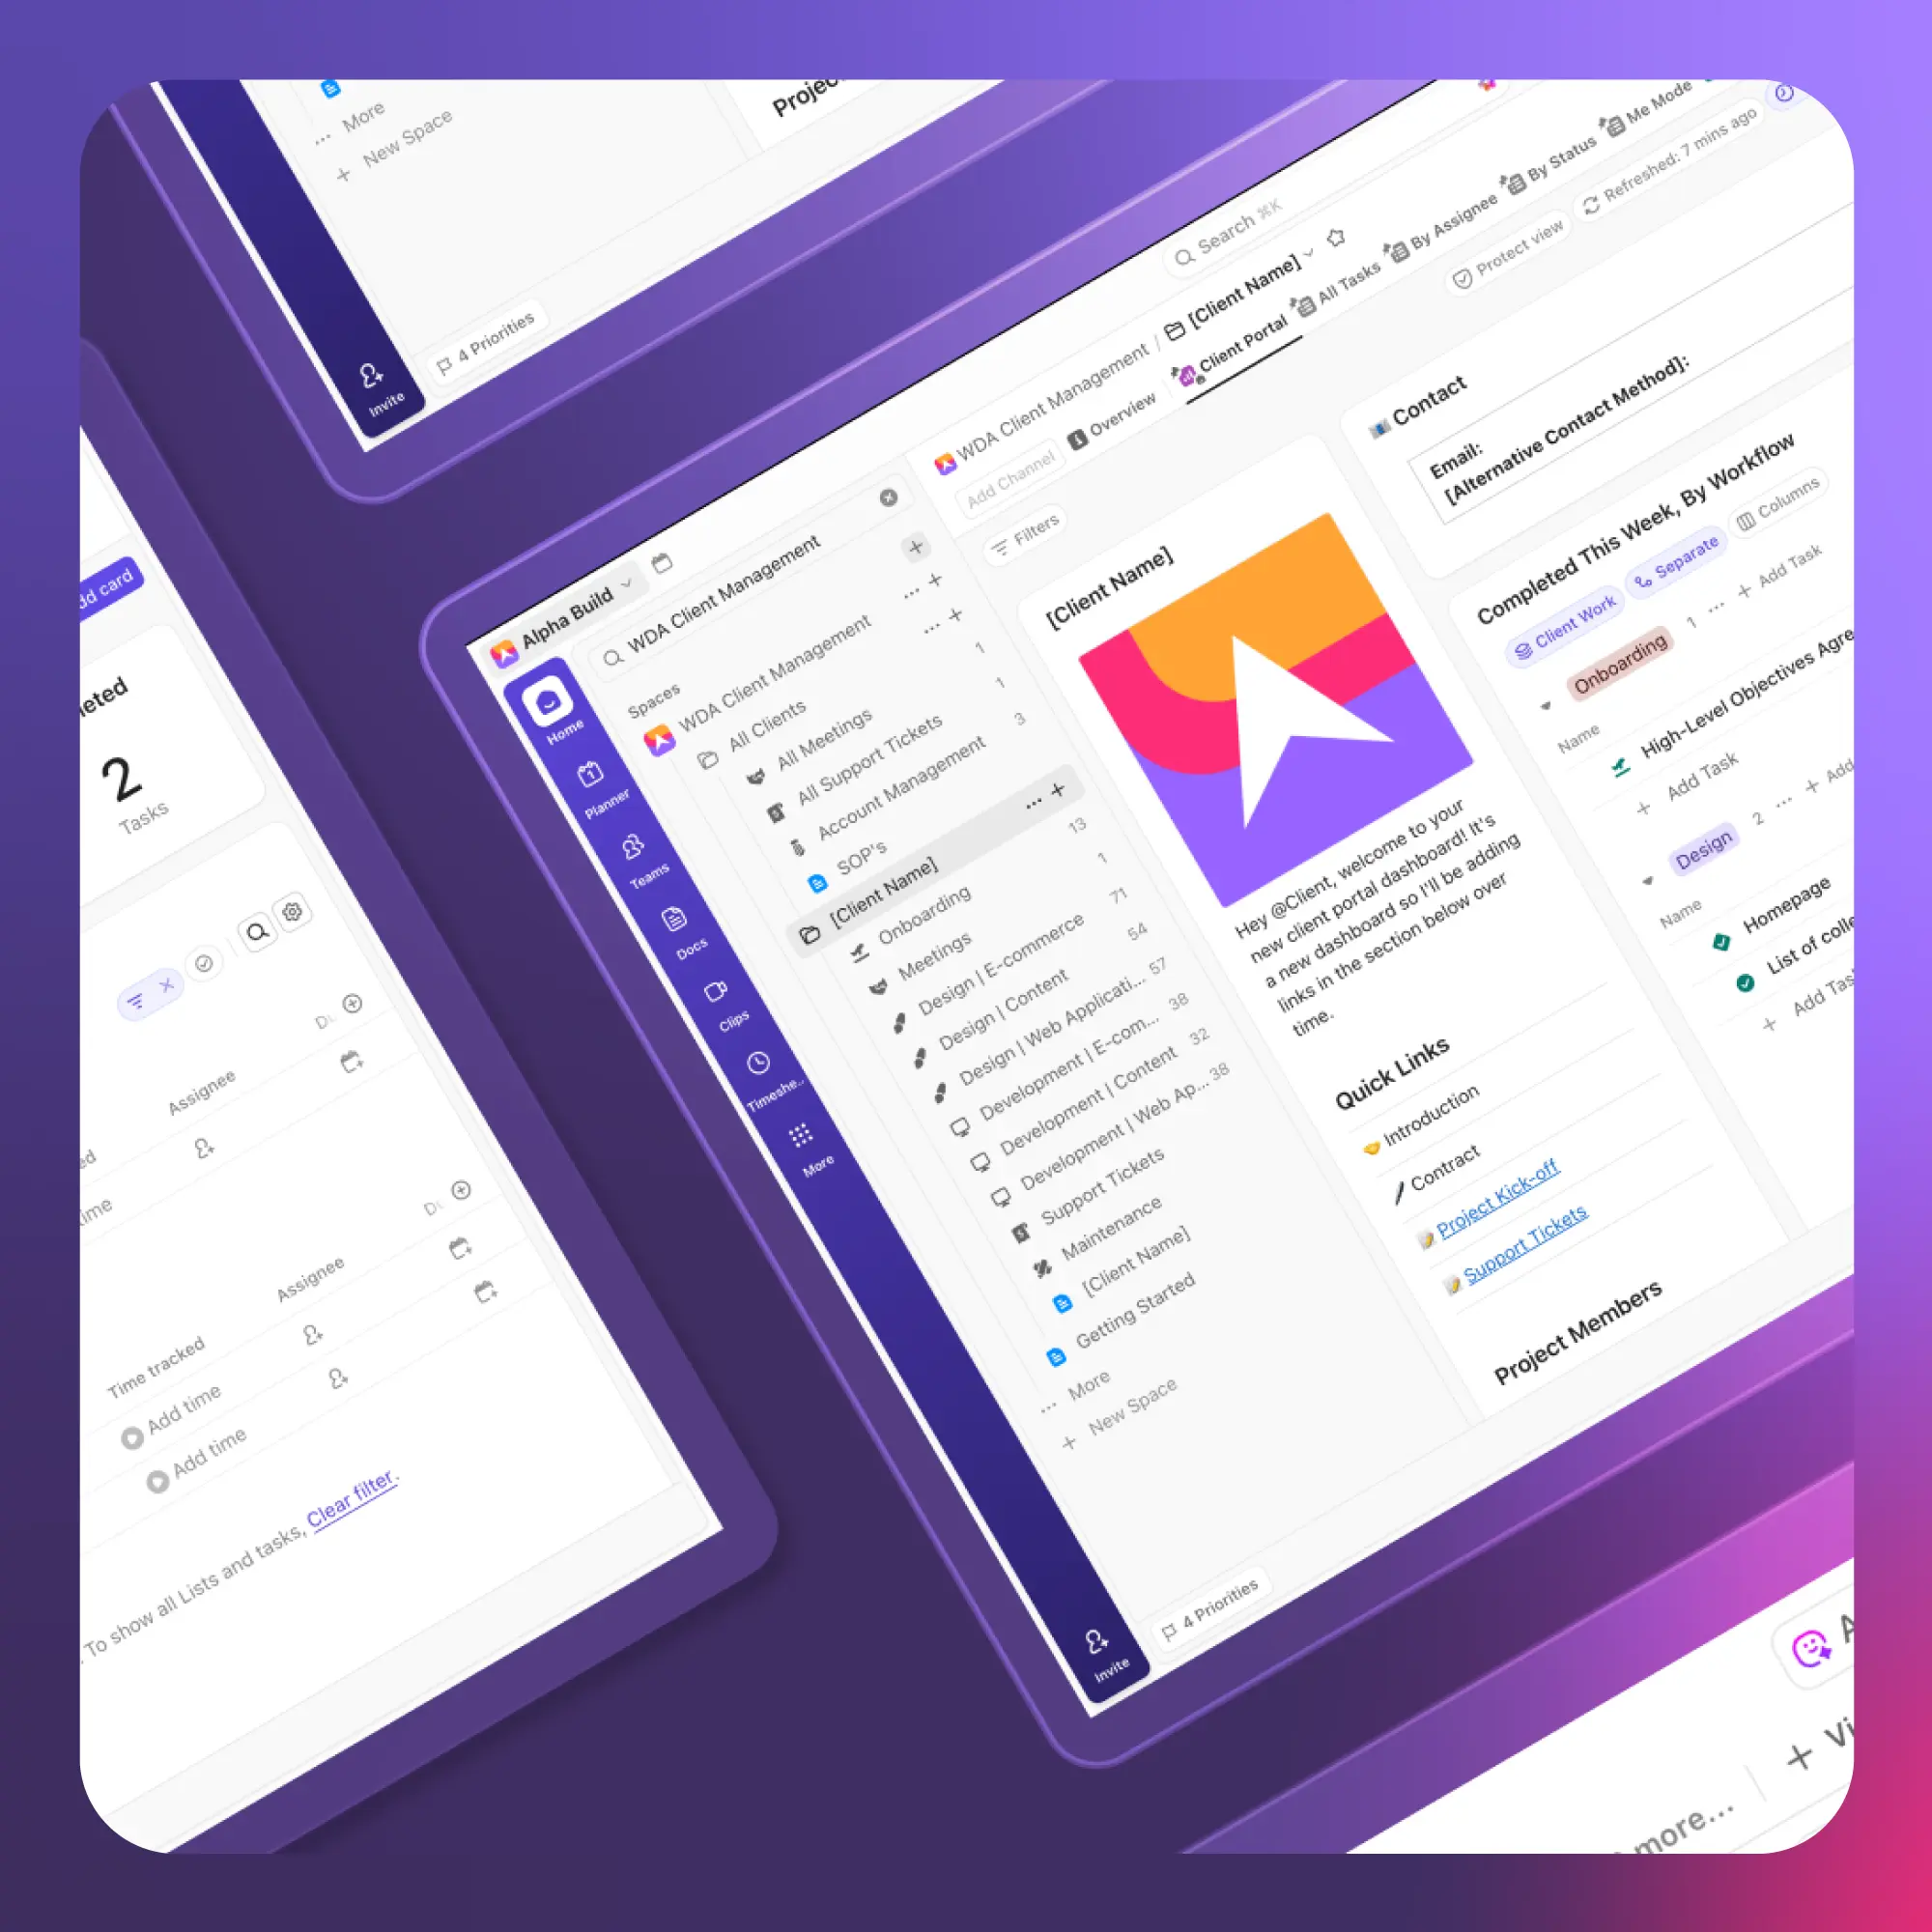
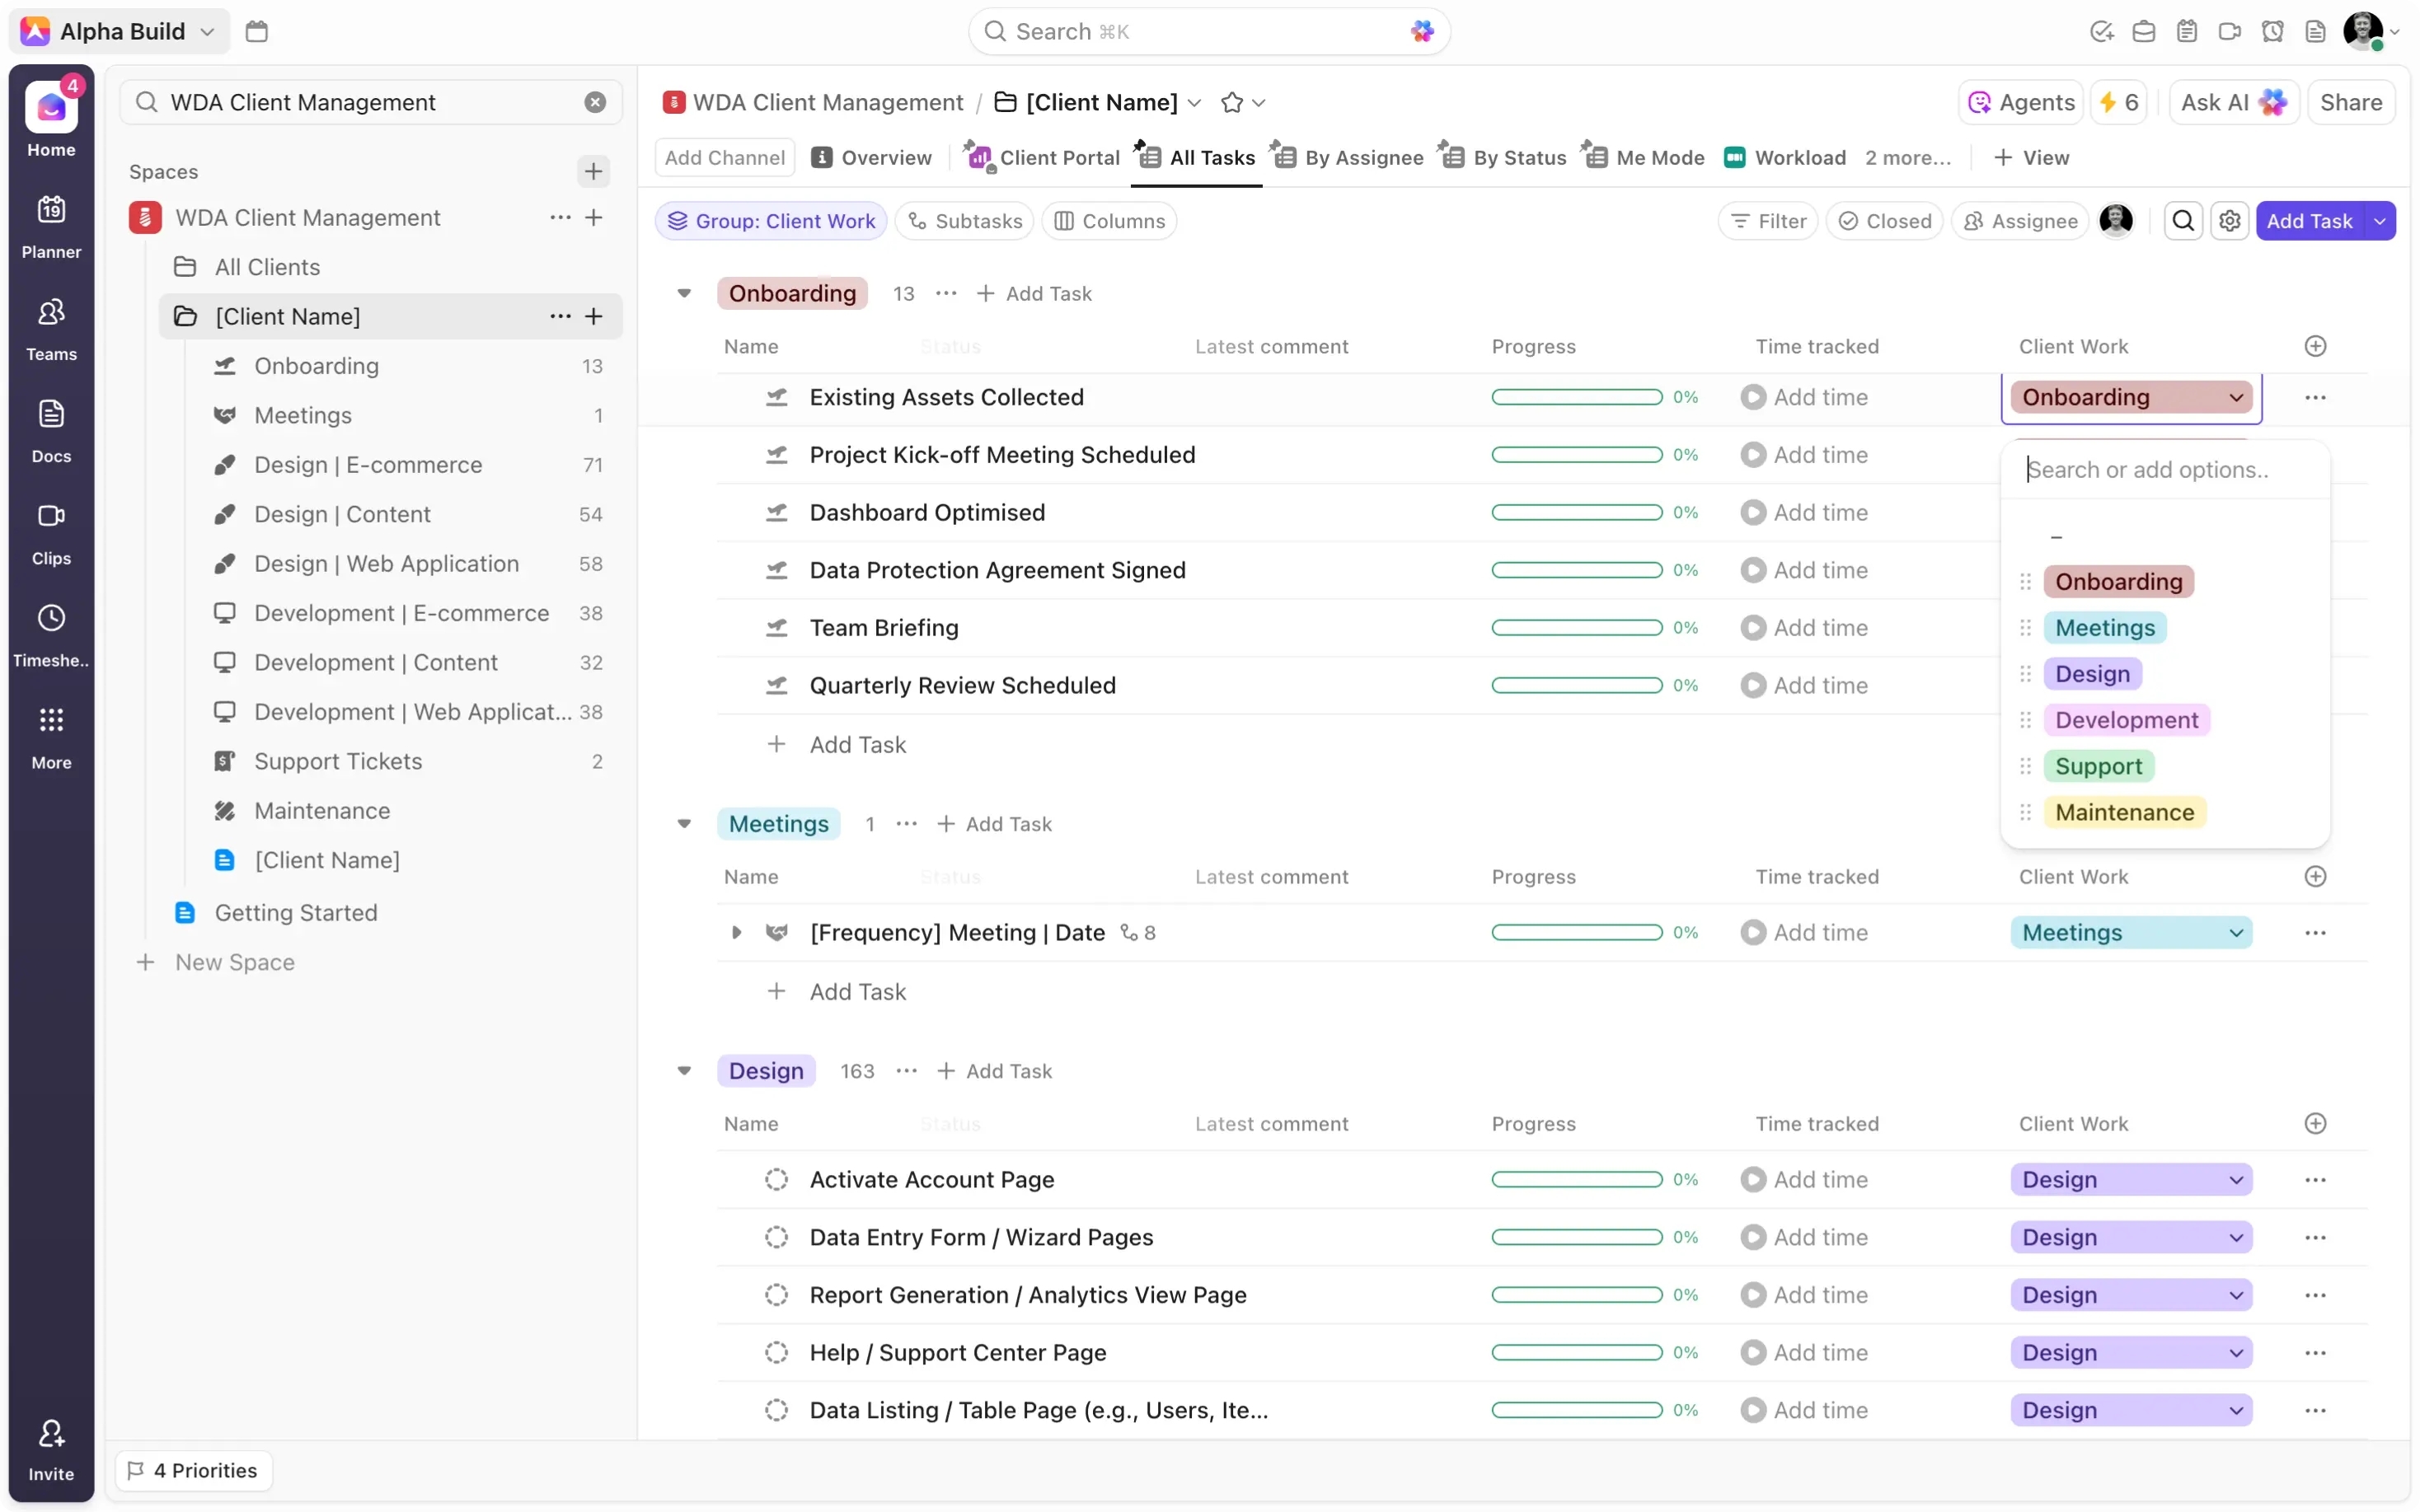
So how do we do this in a web development agency client management context? Well, the first thing we suggest is creating a dedicated ‘Client(s) Management’ space. This keeps all client data in one place and makes reporting dashboards more effective. From there, you need to decide on the subsequent Folder and List structure that you will use to manage all of your clients. Do you segment your work by project, primary workflow, or client? While all options are possible, we suggest the client-centred approach.
Organizing folders around individual clients makes navigation intuitive and ensures all their tasks and workflows are consolidated in a single, dedicated location. With all of a client's tasks contained in one folder, data is automatically aggregated at that level. This allows you to effortlessly generate insightful reports, providing exceptional visibility for both your team and your client.
Within each of your client folders, you can then create a series of lists that facilitate all client workflows, from onboarding, to design, development, and support. This enables you to include unique custom fields, views, and automations that help mirror each of these distinct workflows, streamlining operations. Moreover, you guarantee that all client-related tasks are housed in the corresponding client folder, creating comprehensive client siloes that allow for powerful dashboard reporting.
_1761782014091.webp)
Custom Workflows to Handle all Client-Related Tasks
Within each client folder, create Lists that reflect your agency’s workflows:
-
Onboarding - Create an onboarding list in your client folder to capture vital kick-off information and guide you through the tasks involved in your onboarding process. To achieve this, create a ‘Project Kick-off’ form as a view in your onboarding list to capture client information. Fit this form with relevant questions about your clients project goals, design preferences, target market, etc, to gain powerful insights prior to kick-off. In addition, populate your list with standard onboarding tasks to guide you through the different stages of onboarding.
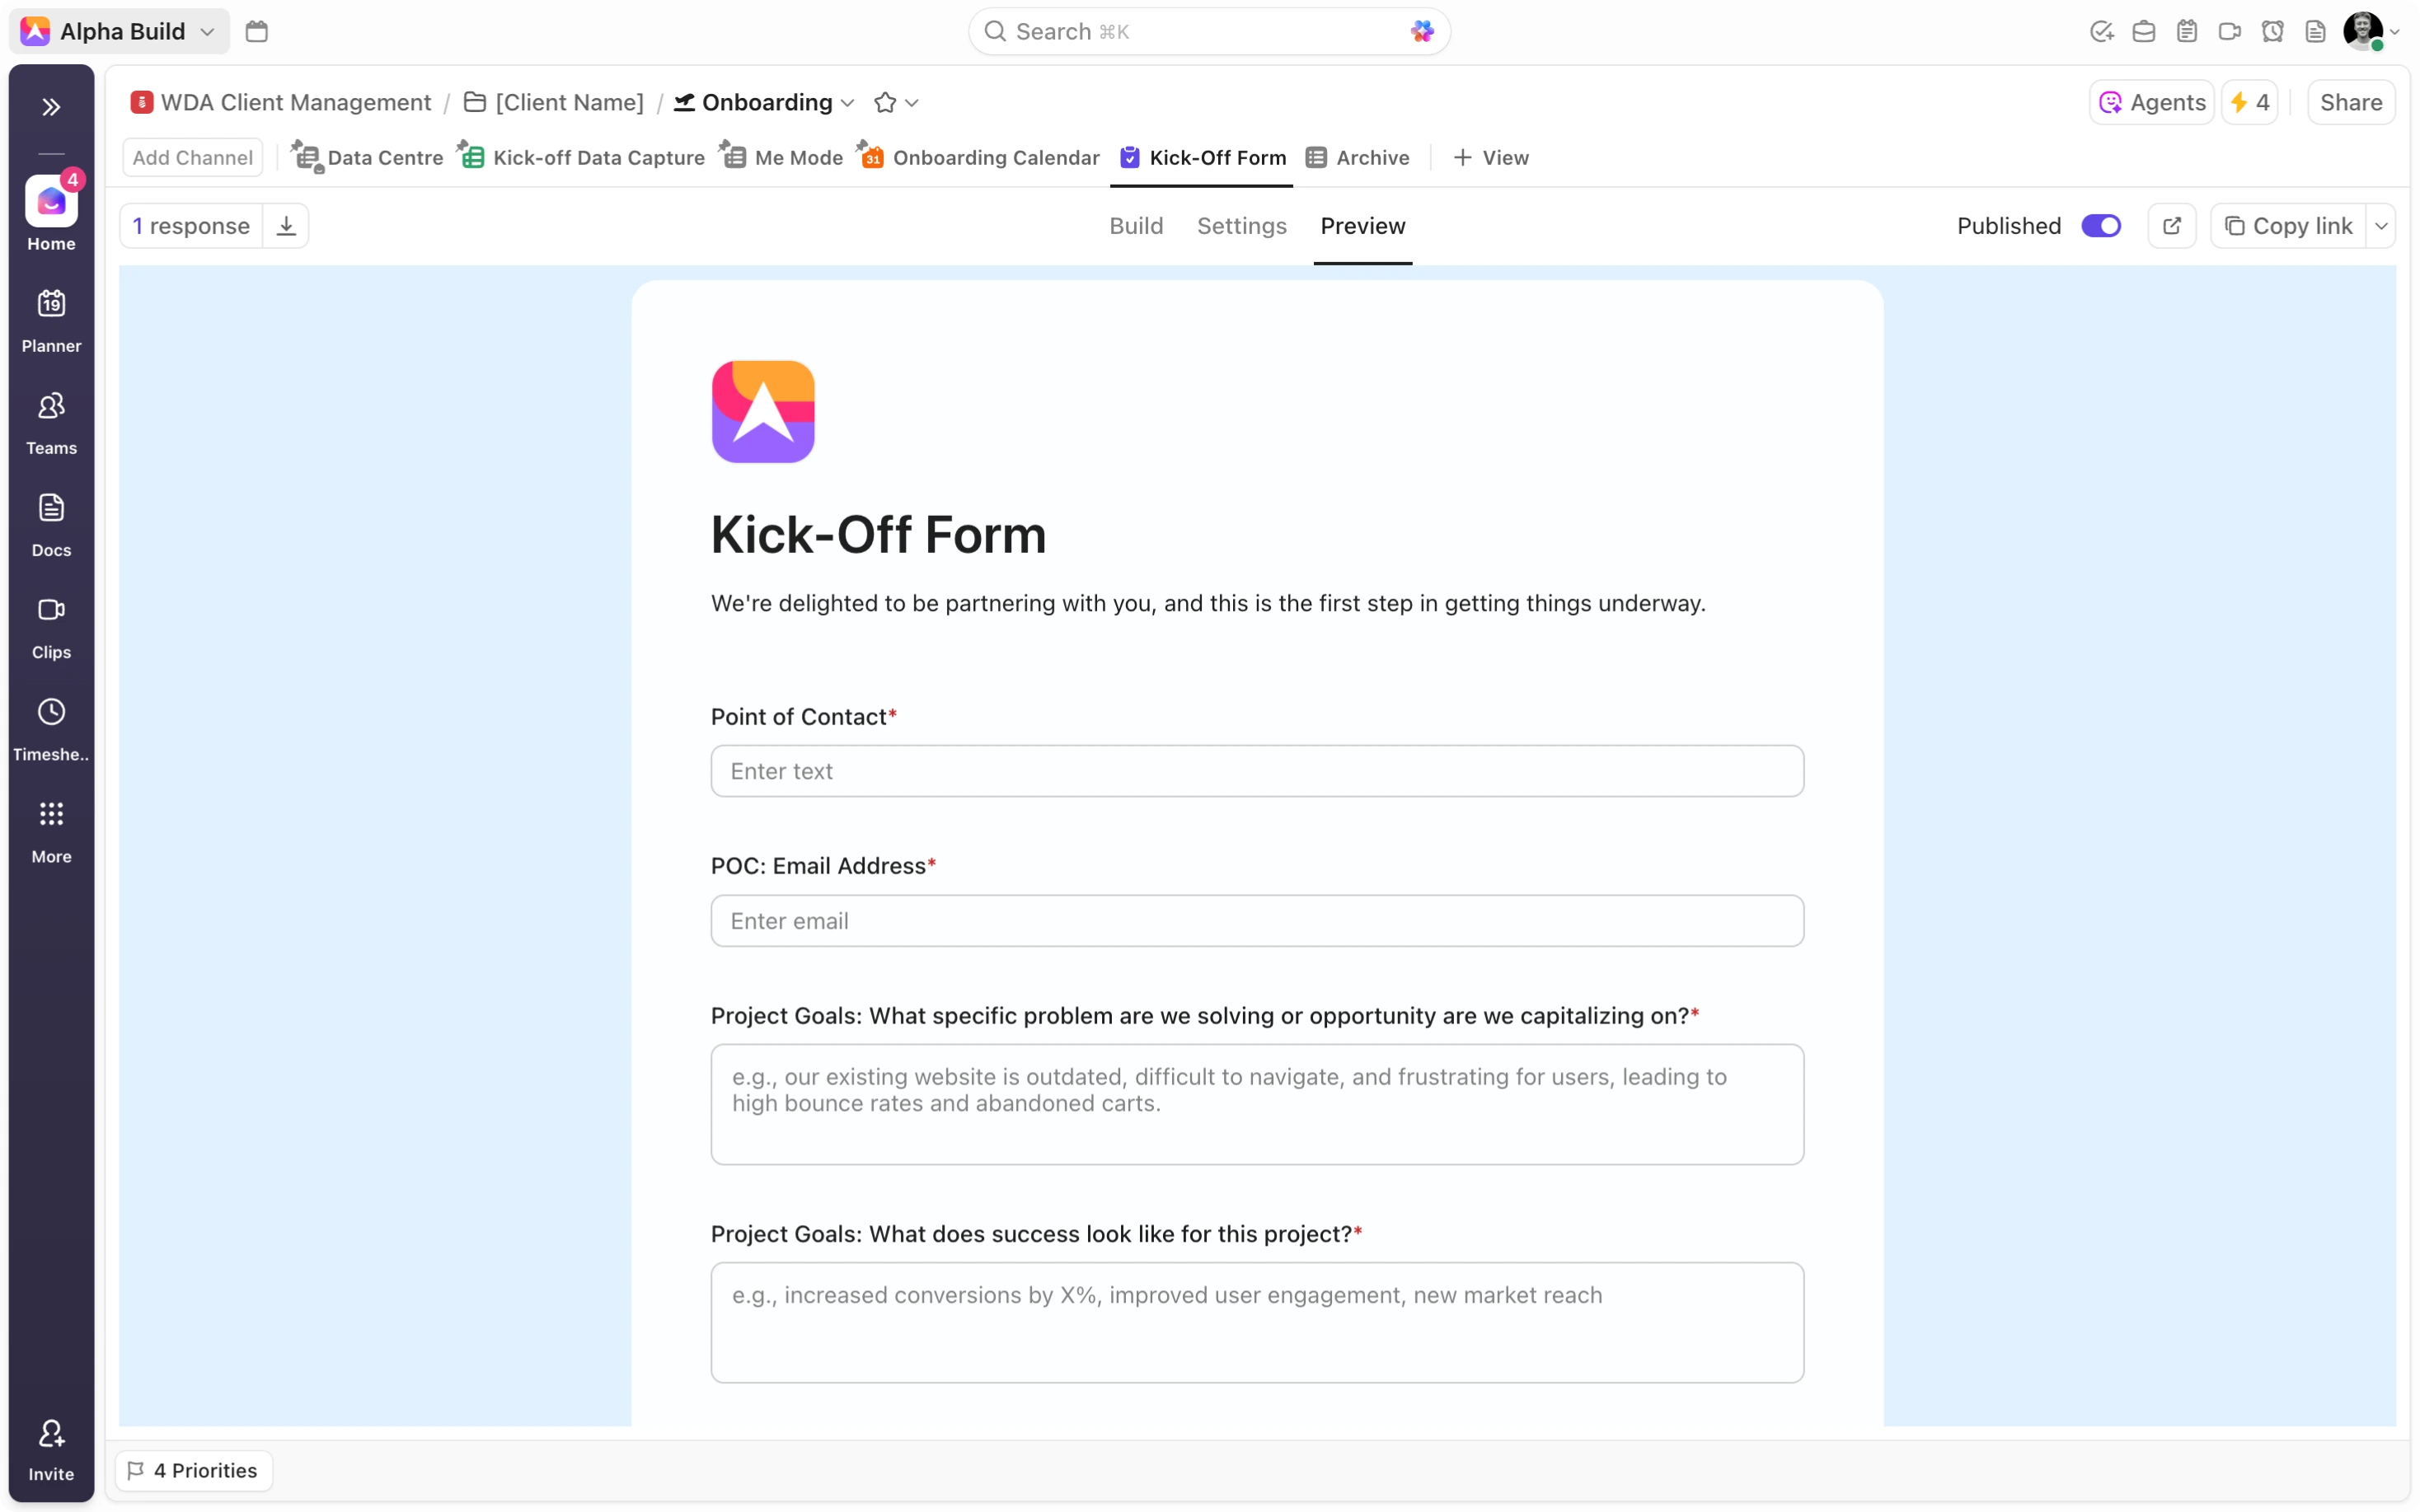
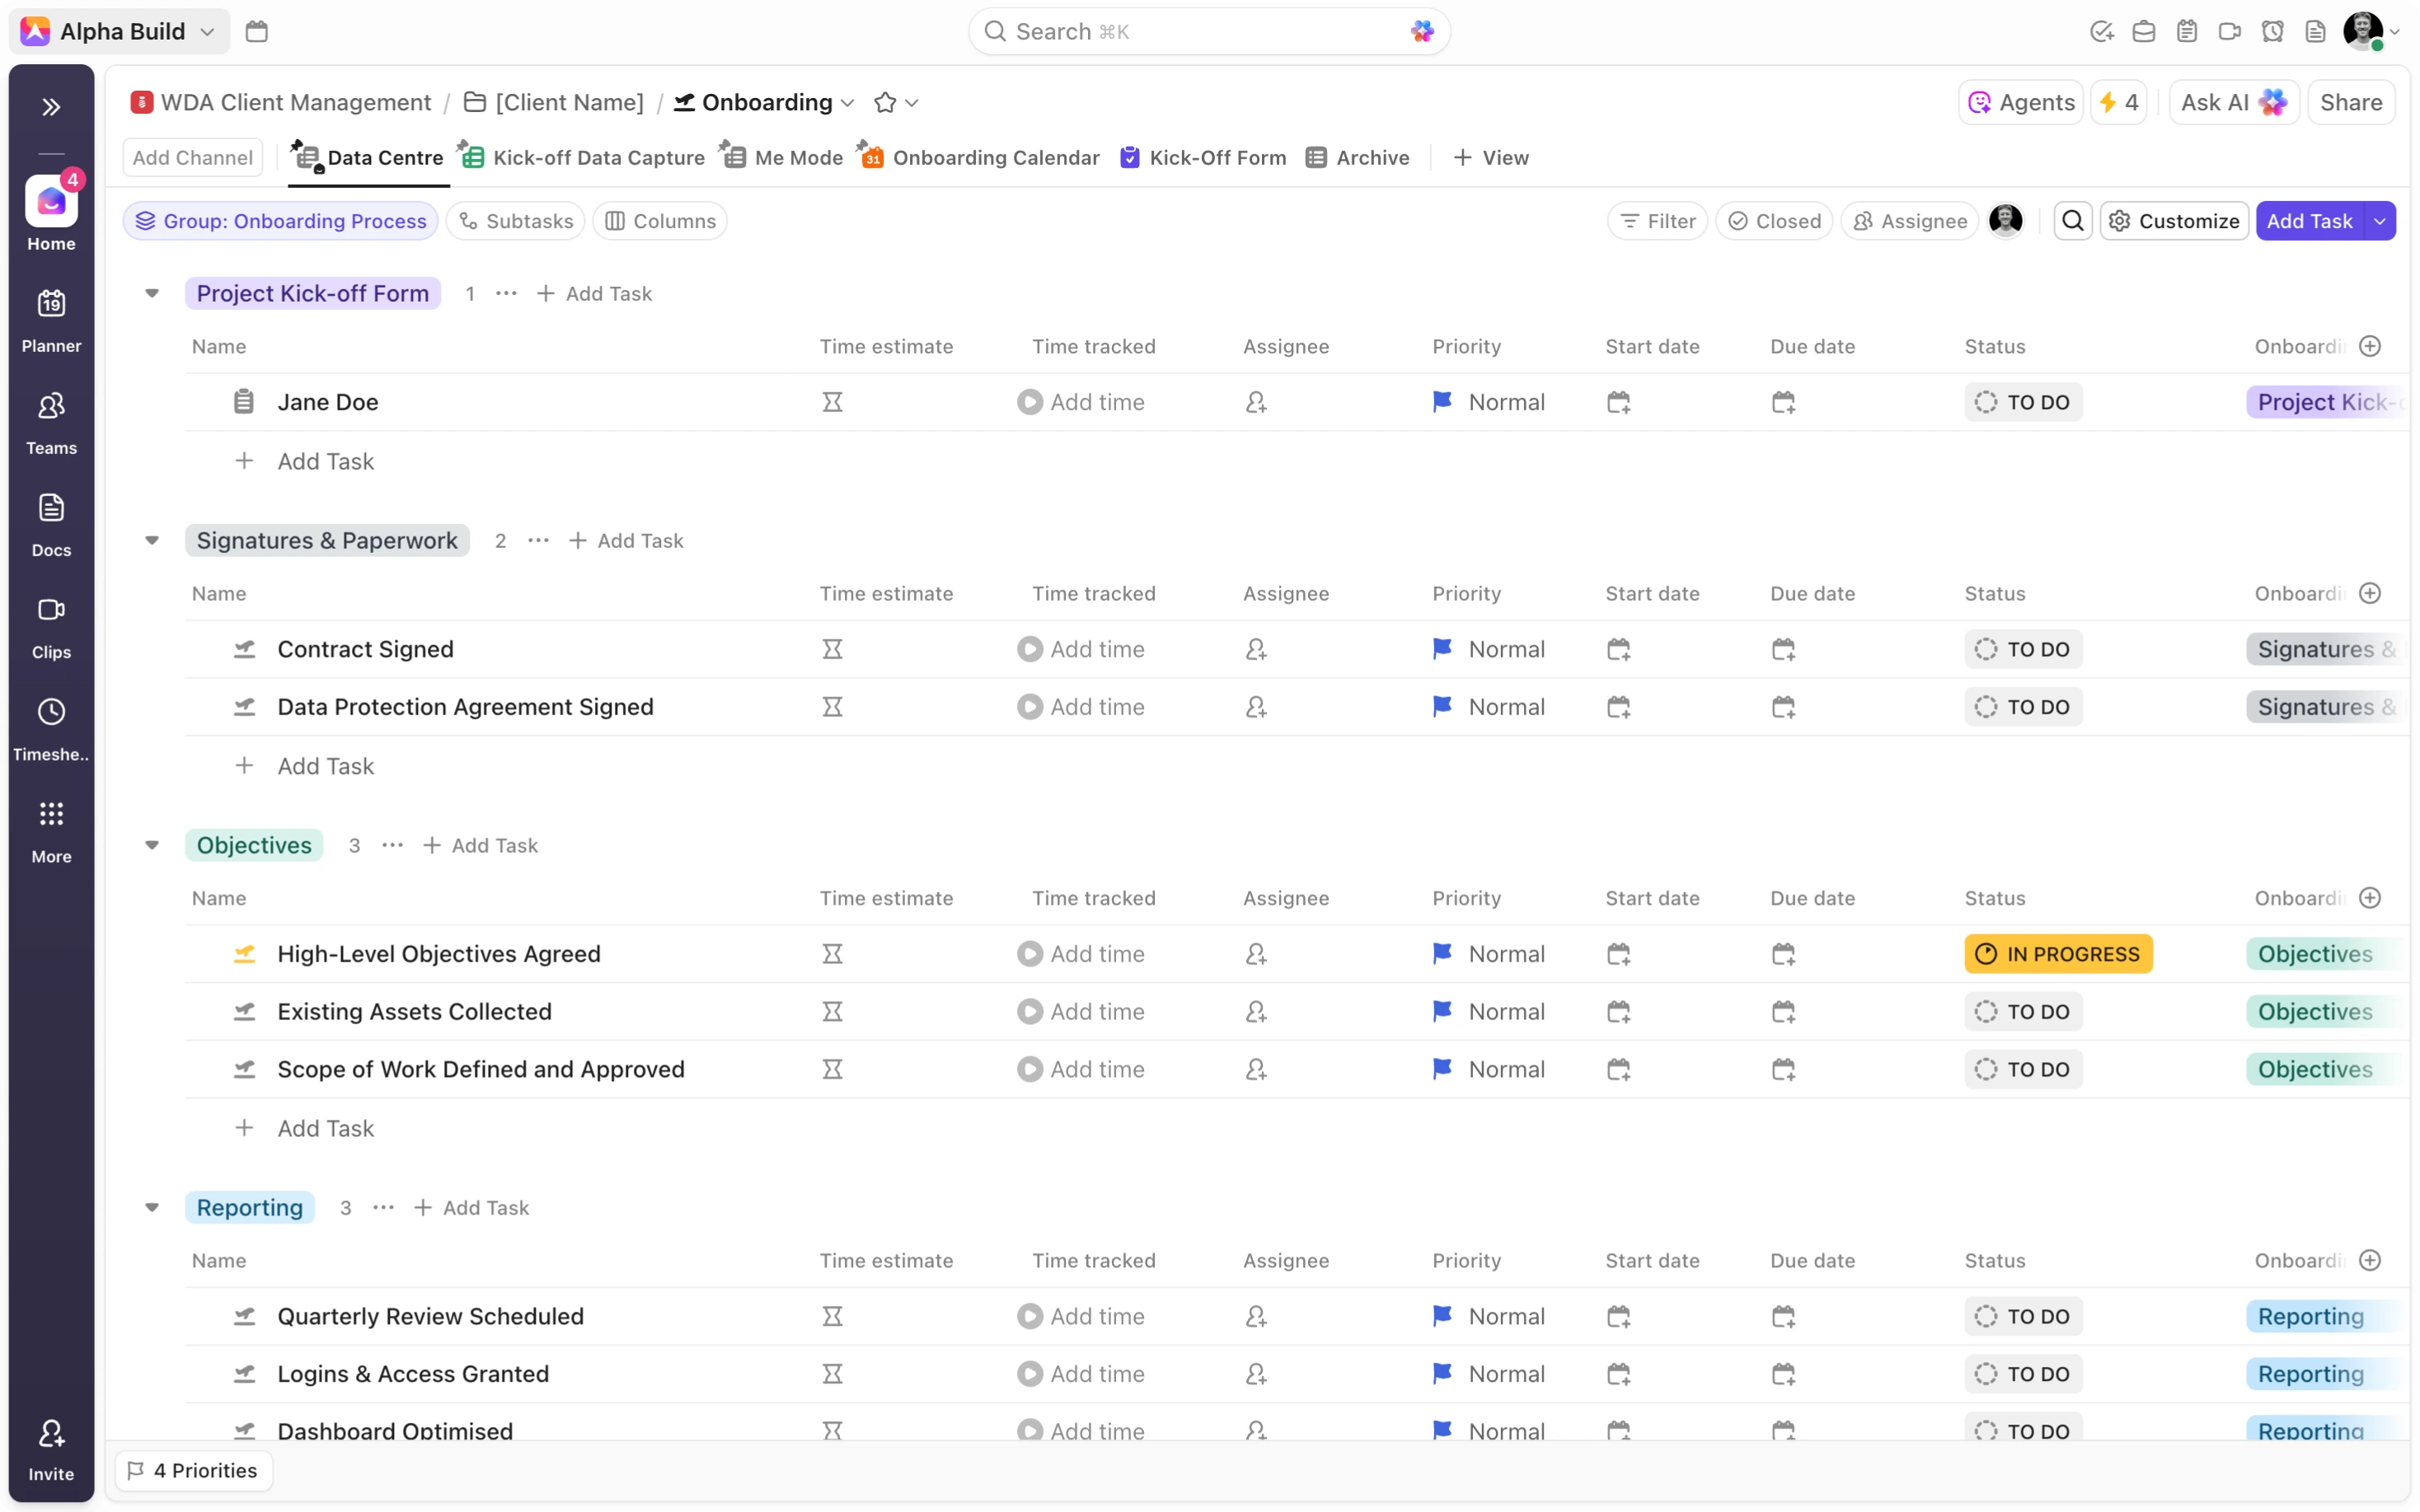
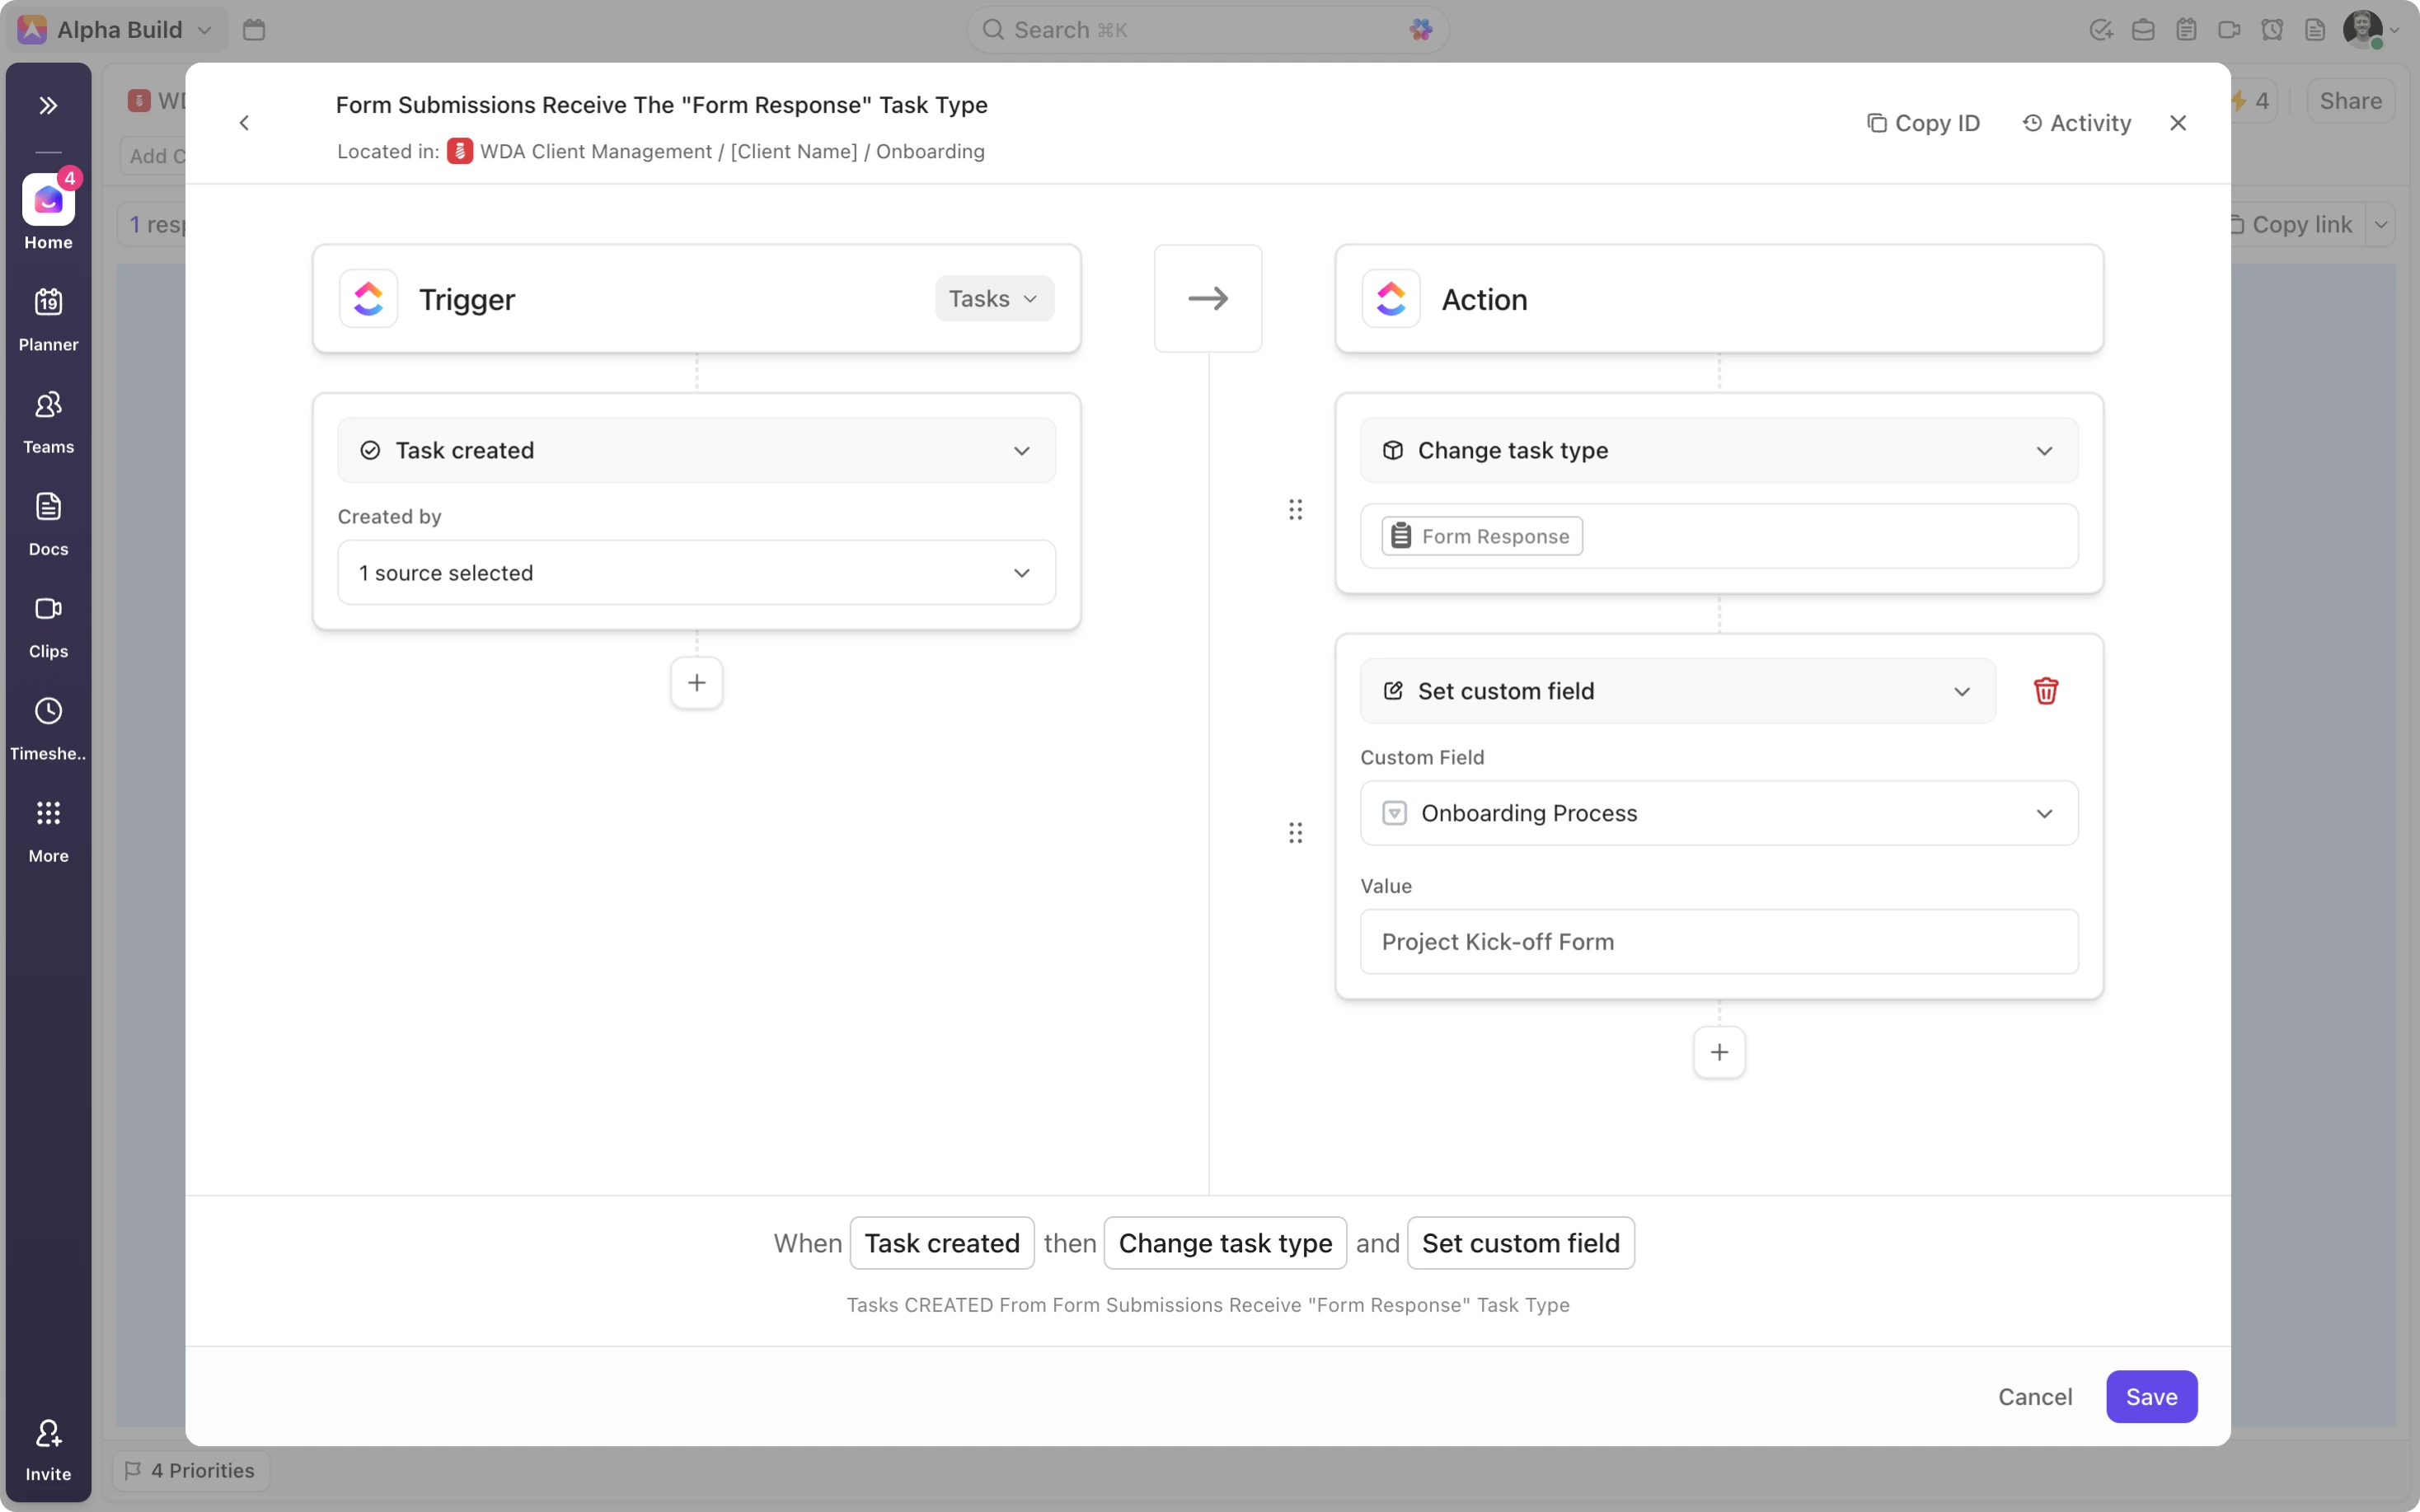
(Tip: Create an ‘Onboarding phase’ dropdown to distinguish between the different onboarding phases. Combine the dropdown with powerful automations to ensure that form responses automatically inherit the ‘Kick-off form’ label. Group tasks by ‘Onboarding phase’ in your default view to achieve great visibility on your different onboarding components)
-
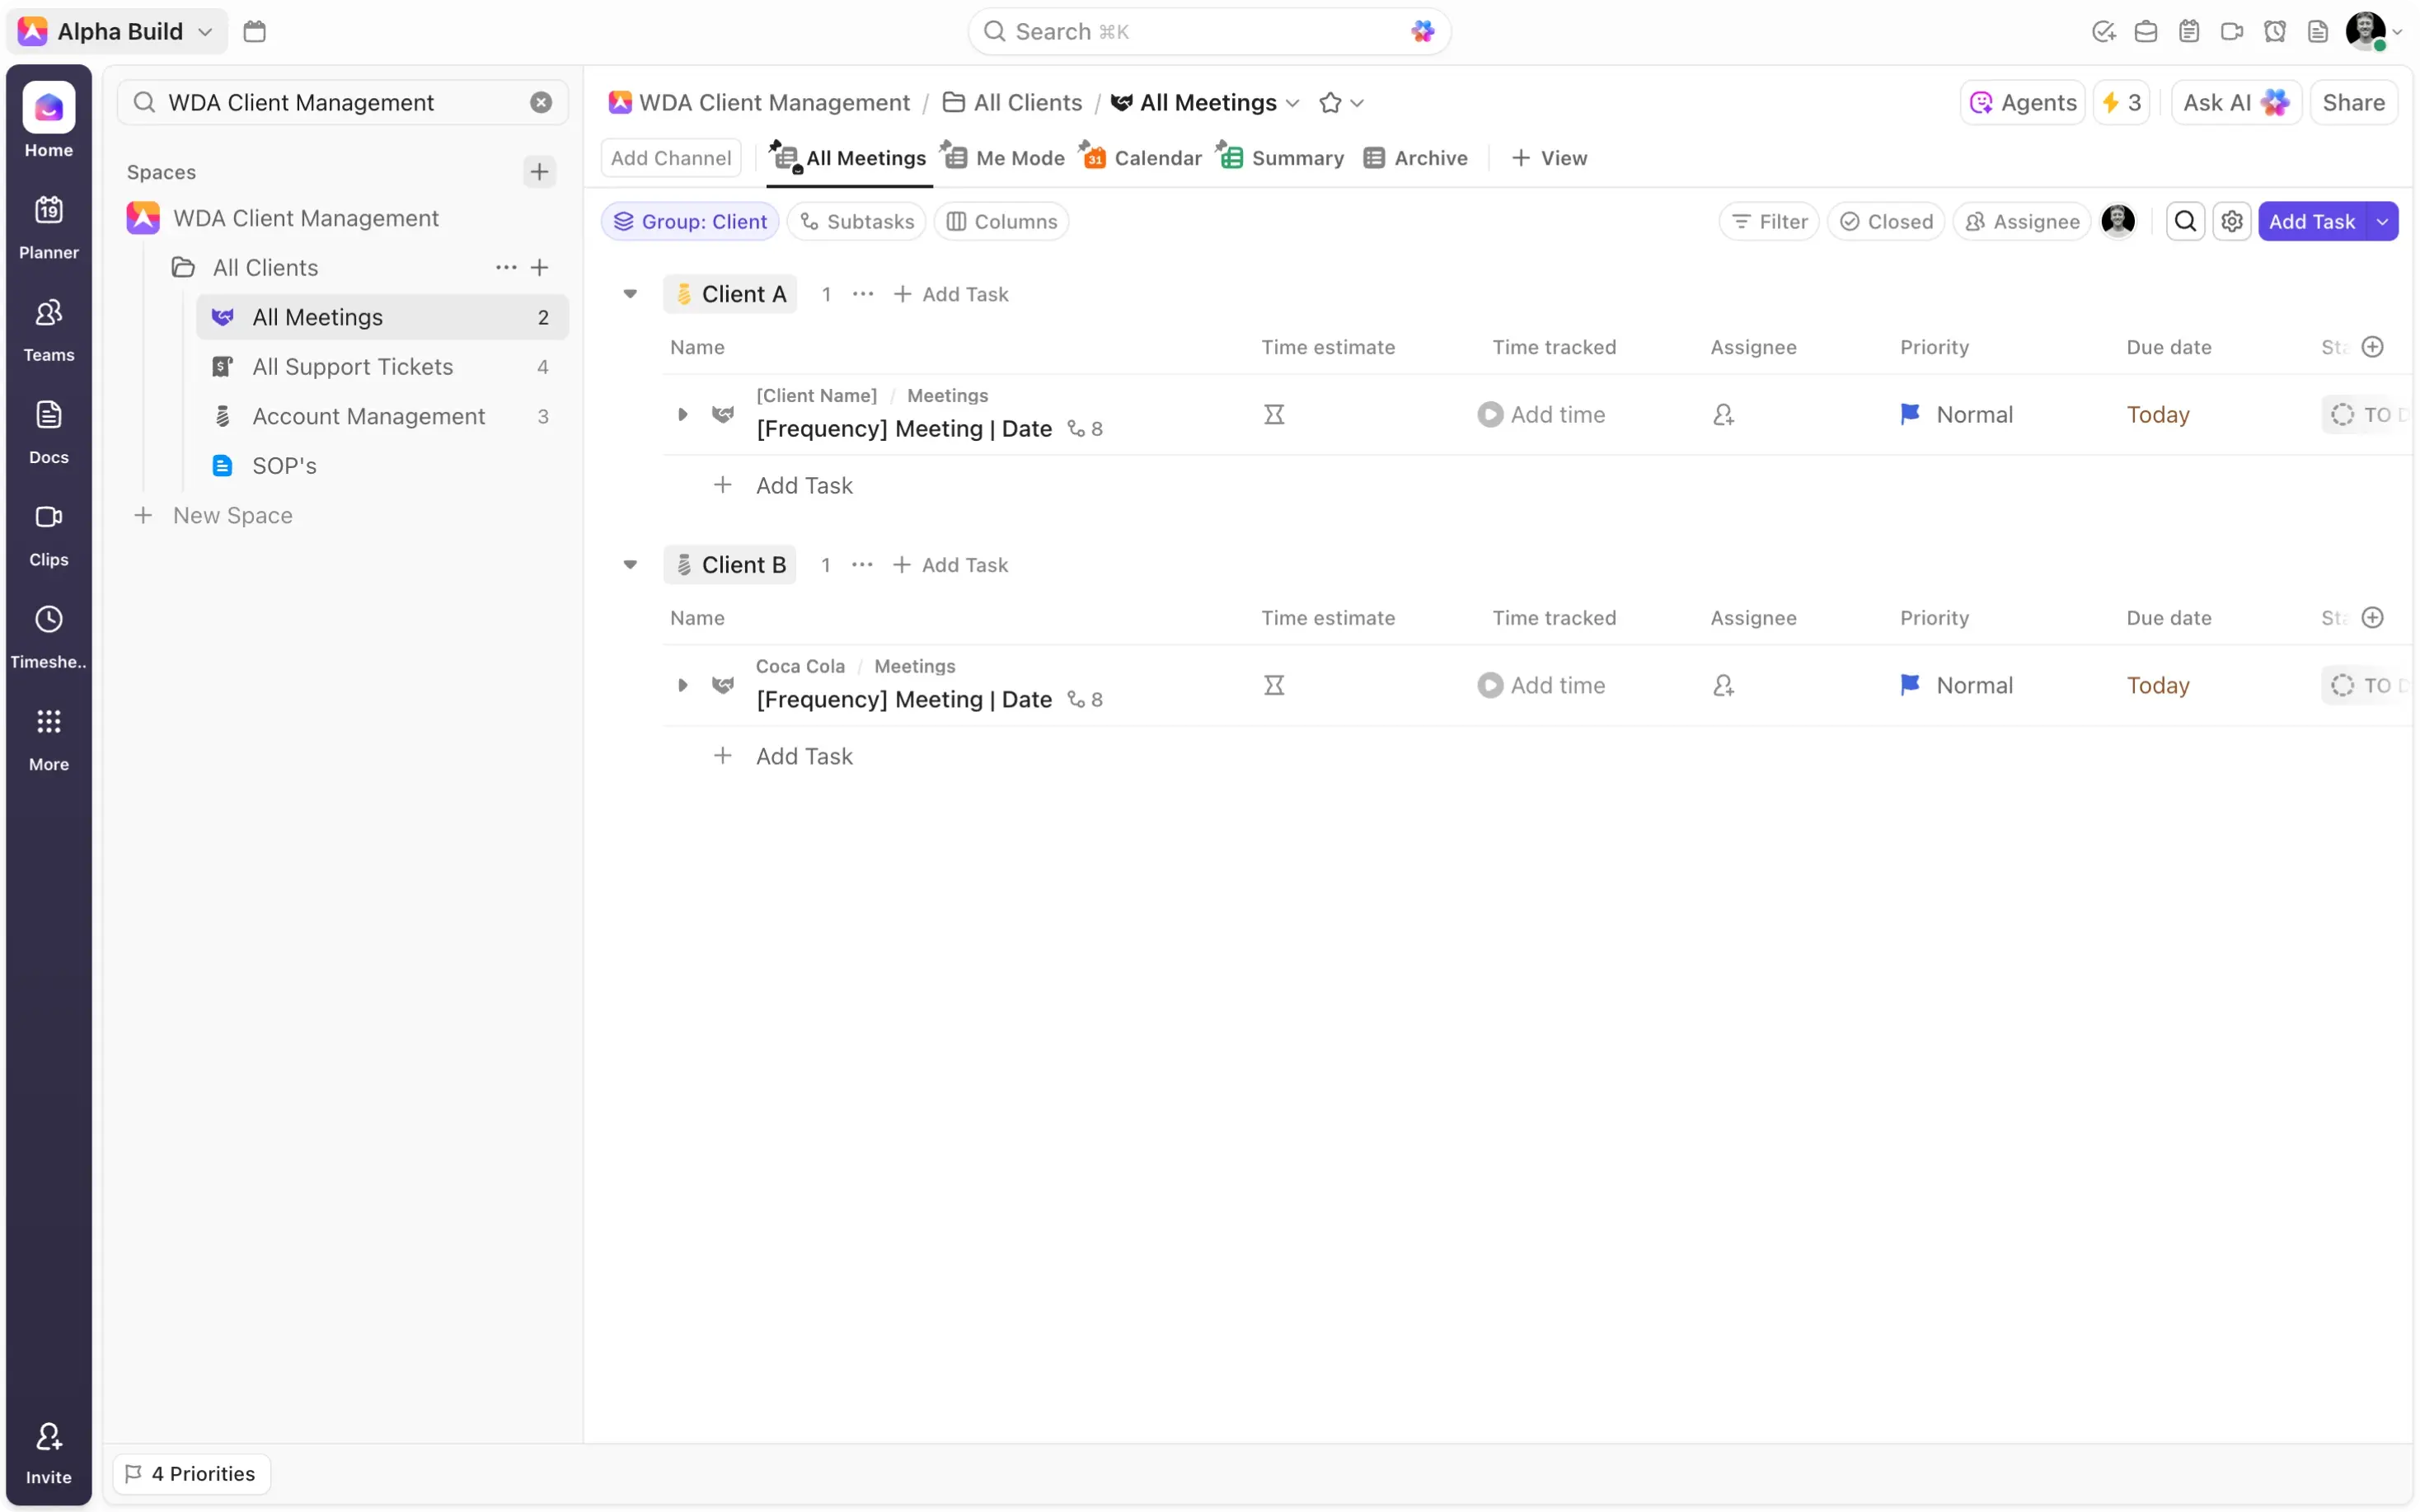
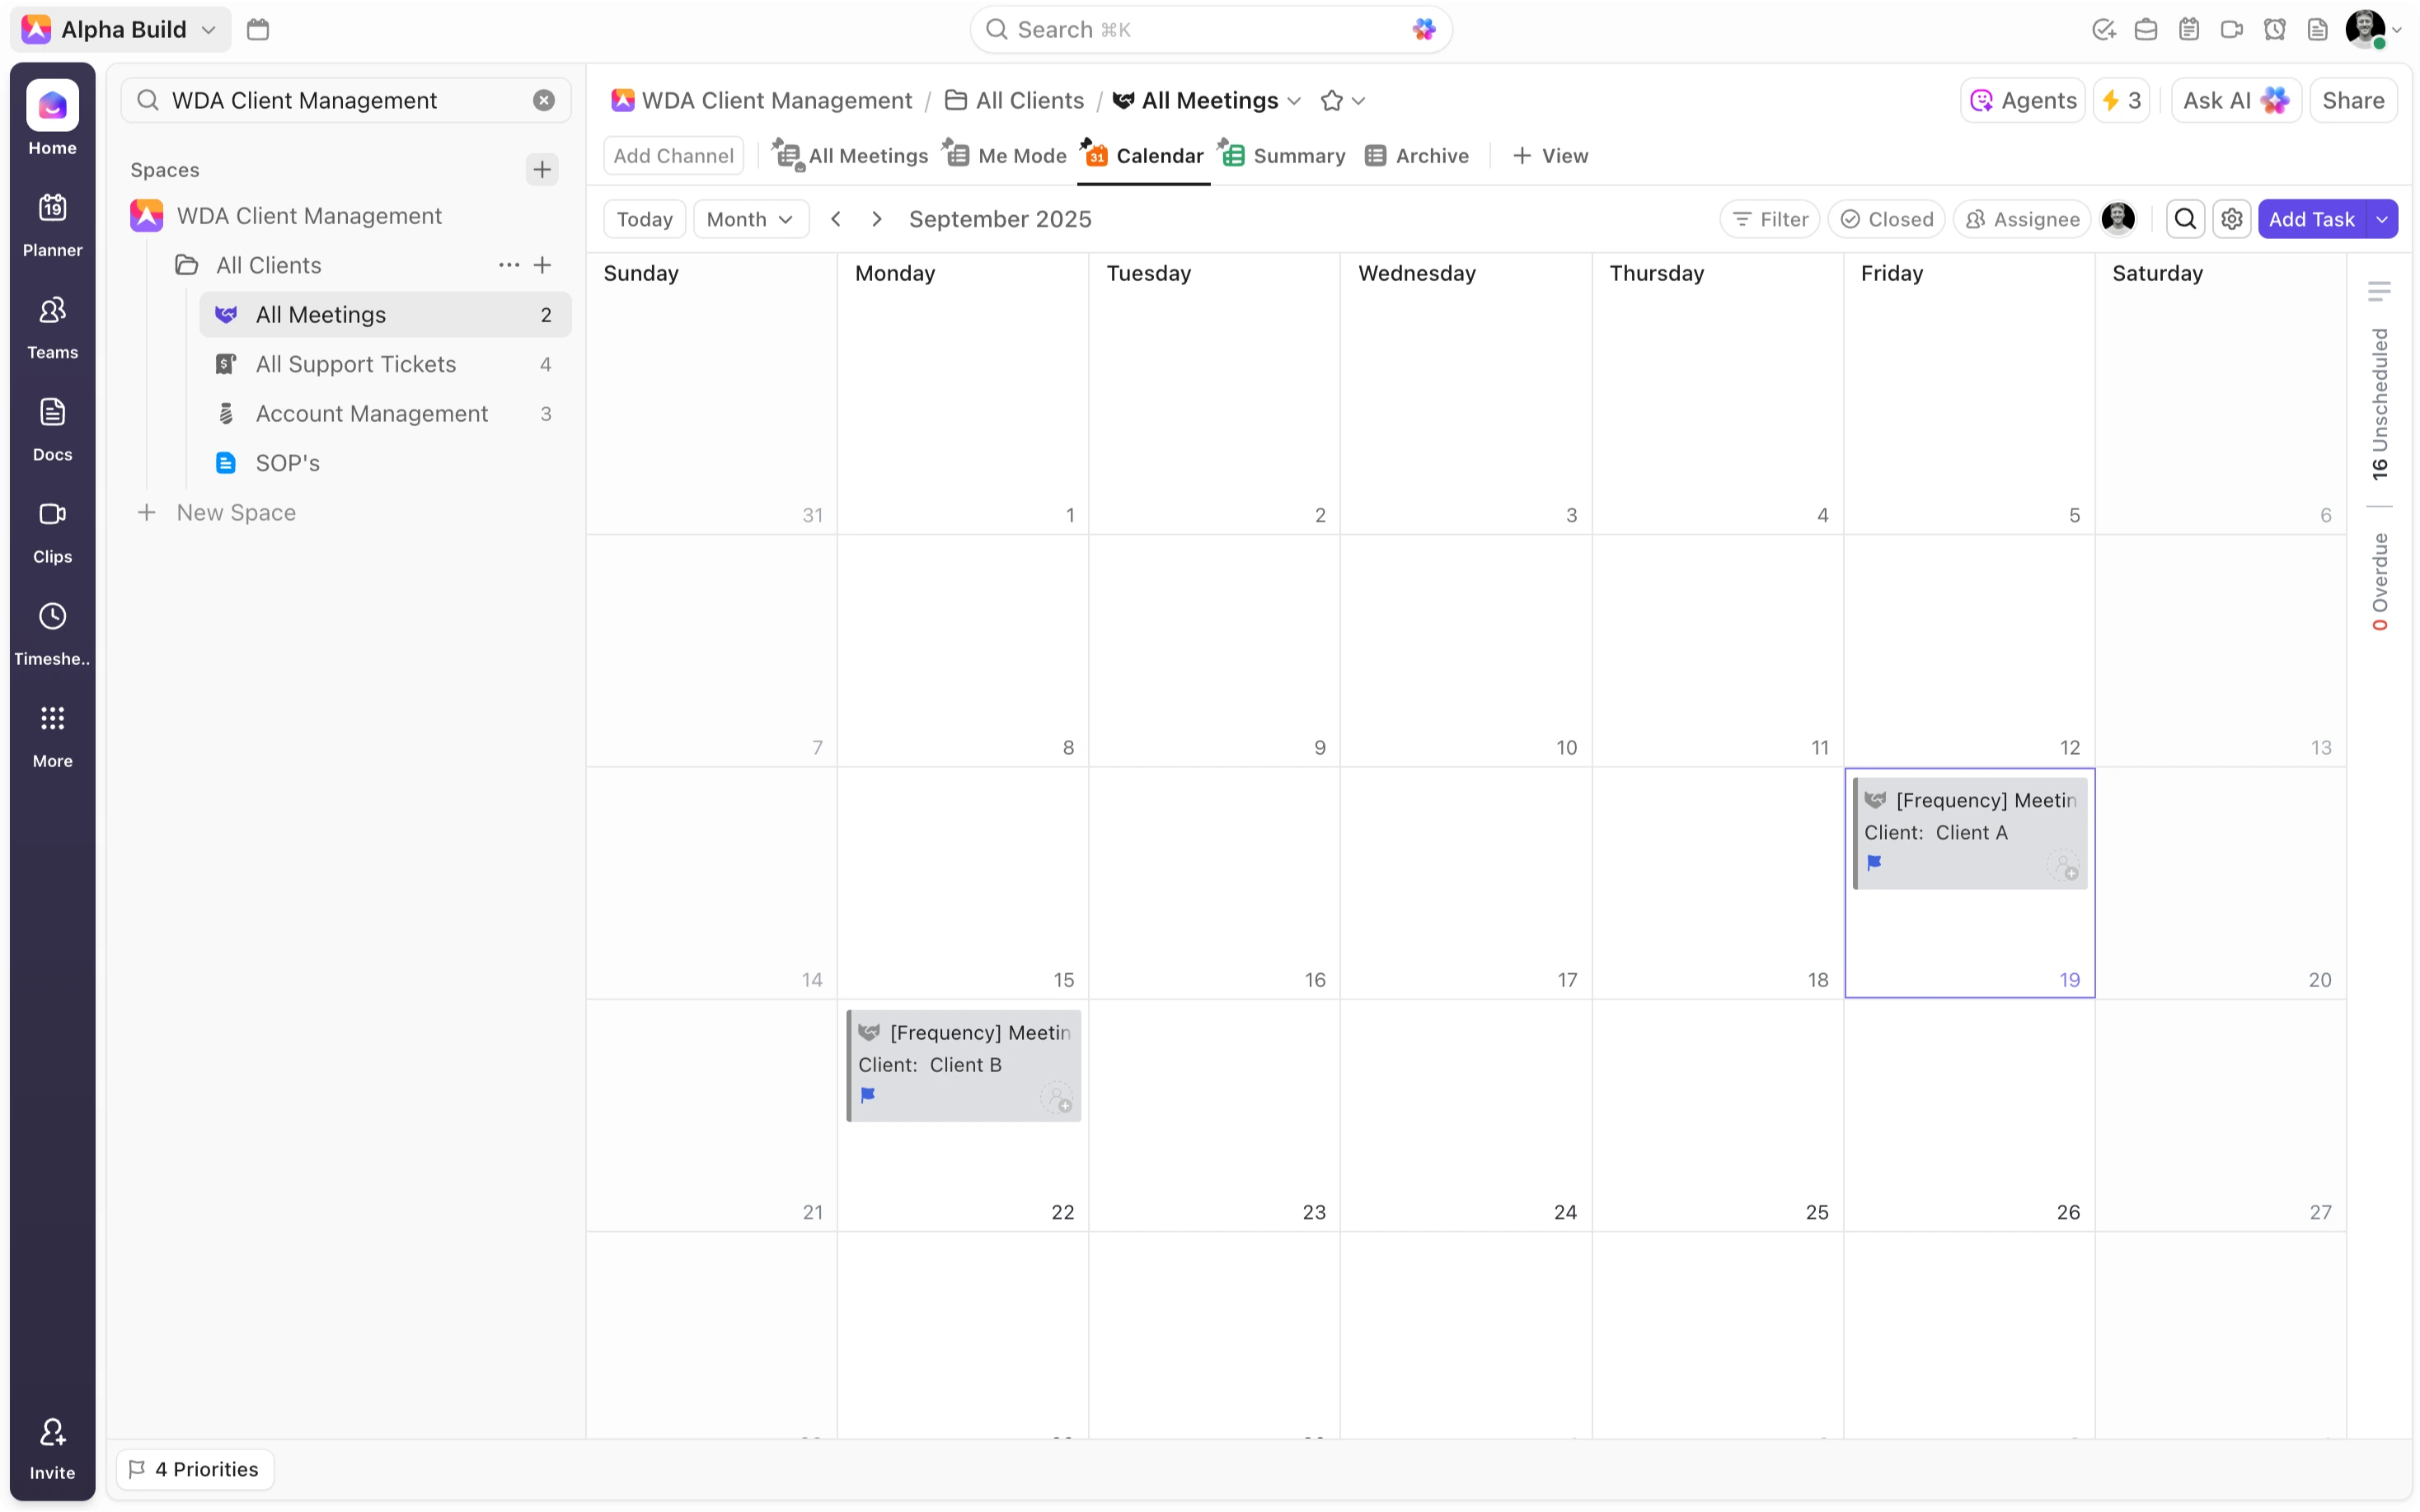
Meetings - Create a ‘Meetings’ list to track and manage all of the meetings relating to your client. Opt for a naming convention like ‘[Cadence] Meeting | Date’ for your meeting tasks. Custom fields can then be introduced to add additional context. Consider, for example, including ‘Cadence’, ‘Attendee’, ‘Conference room', and ‘Meeting notes’, allowing you to attach relevant data to each of your meetings. Depending on your preference, meeting artifacts, agenda items, action items, key decisions etc, can be included as subtasks or documented in a Doc which can then be linked to the corresponding meeting tasks. To take things further, look to include a calendar view to get clarity on meeting dates.
-
Design & Development - Create design and development lists that accurately reflect the way your agency likes to build sites. If you’re one of those web dev agencies that has their fingers in many pies – building sites for a range of different use cases – then consider creating unique design and development lists for each of your different site categories. In doing so, you give yourself the freedom to scope out the relevant stepwise tasks associated with each of your unique site types. For example, by creating ‘Design | E-commerce’ and ‘Development | E-commerce’ lists, you’re able to program in preconfigured tasks that scope out the process of building a standard E-commerce site.
-
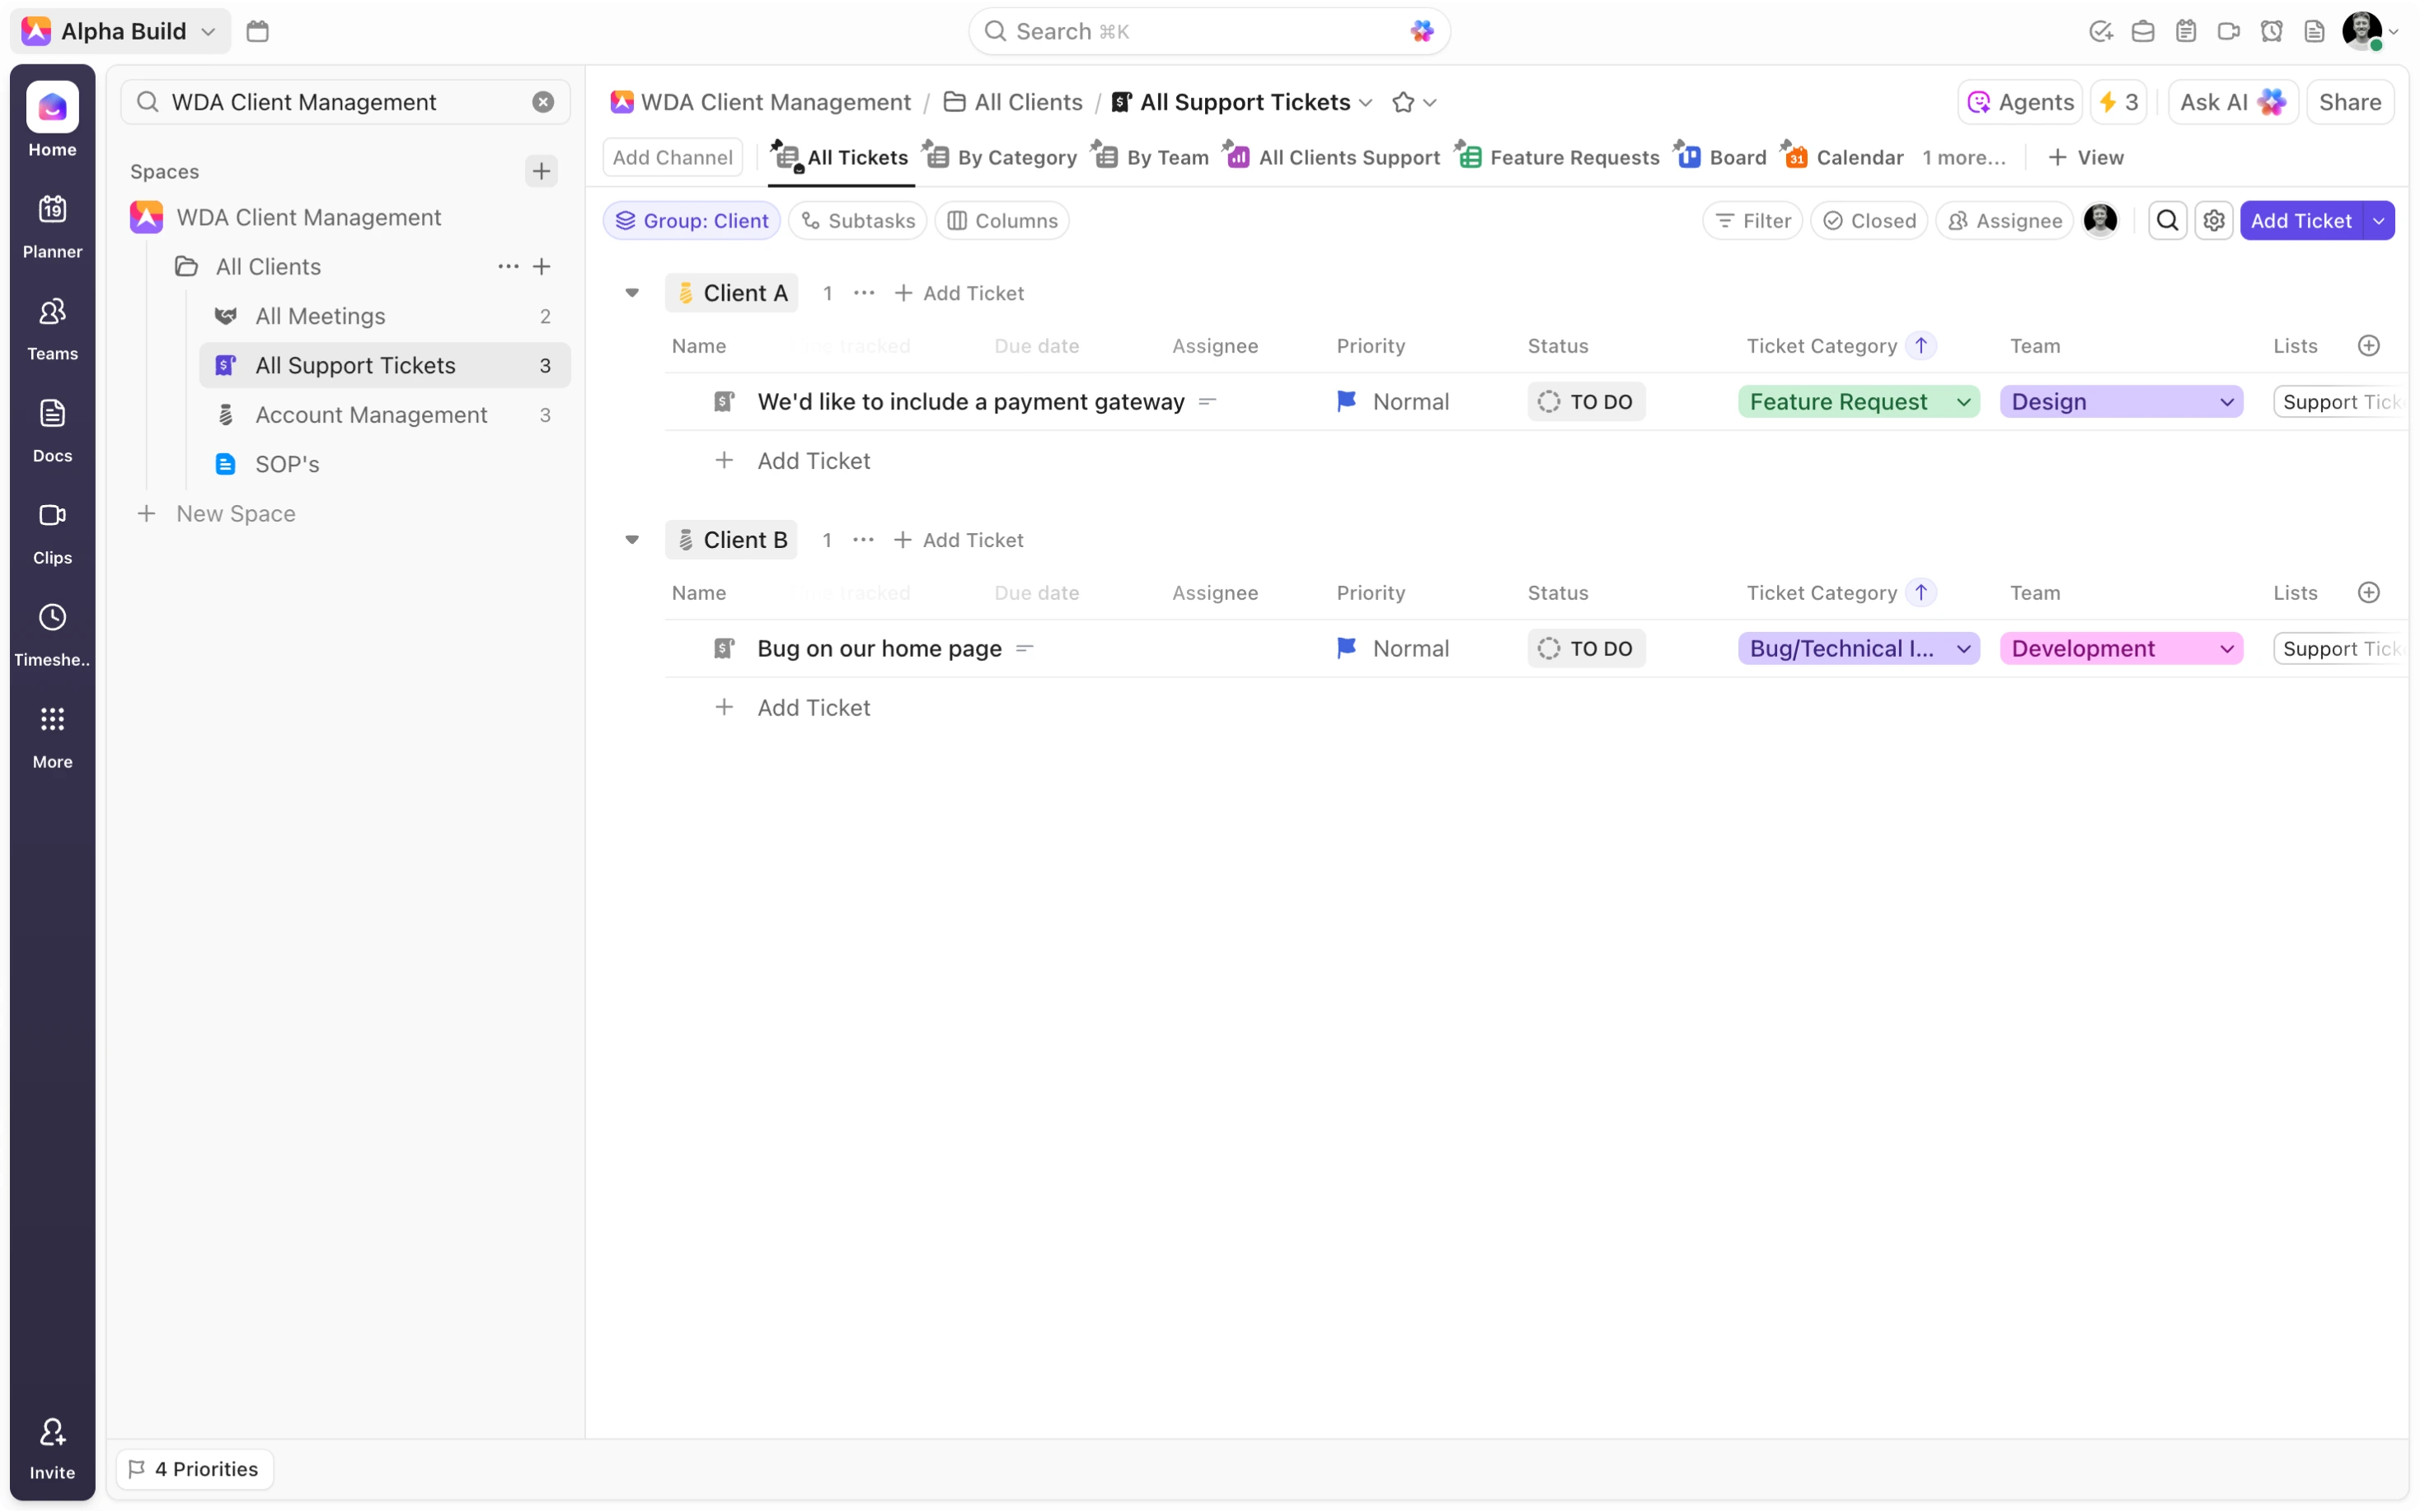
Support tickets - Bugs, feature requests, and other queries often arise during the build process. For this reason, we suggest creating a ‘Support Ticket’ list. Fit this list with a ‘Support Tickets’ form, allowing clients to easily submit tickets. Create a ‘Ticket Category’ dropdown option for clients to select from a list of common issues associated with your site builds.
-
Maintenance - Add an additional list designed to handle your maintenance workflows. If your maintenance tasks follow a replicable pattern and cadence, consider adding preconfigured tasks with recurring due dates to streamline this process.
This structure mirrors the full client journey, ensures nothing gets lost, and feeds into powerful client dashboards for visibility.
Back-End Configurations: One-to-One Mappings
Beyond the usual workflow customizations, there's a final enhancement we recommend to truly elevate your client folders: One-to-one mappings. These are additional data points working in the background to distinguish between your various client workflows, which improves both visibility and reporting.
To implement this, first create a dropdown custom field on the main client folder, adding a dropdown option for each list within it. Then, apply automations to all of your client lists. Configure them so that when a task is ‘created’ or ‘moved’, it automatically receives the dropdown tag corresponding to the list it’s in.This ensures all tasks created in the ‘Support Tickets’ list receive the 'Support Tickets’ tag, allowing you to group by workflow at the folder level. This allows you to drill into each unique client workflow, enabling you to produce more relevant, informative, and accurate reports.
Client Portals with Dashboards
Clients need visibility, not endless email chains. Thankfully the answer is found in ClickUp’s most powerful feature – the dashboard. Since all project data is already consolidated at the client folder level, producing dynamic dashboard reports is remarkably straightforward.
These 'Client Portals,' built as folder-level dashboards, use ClickUp's cards to visualize information effectively. Pair them with your one-to-one mappings to show insightful metrics like time tracked or progress by workflow type. You can also embed a calendar view to produce a detailed content calendar, employ calculation cards to count the number of tasks in each status, and incorporate task list cards to show tasks due, or updated this week.
To streamline client feedback, include a dedicated approvals task list card. By using filters to show only tasks with a “Client Review” status, you give clients a clear, focused view of what requires their attention. This centralizes all information and feedback in one place. Take it a step further by using an “Approval” custom field and automations to instantly update a task's status when the client selects “Approved” or “Changes Needed”, streamlining the feedback loop.
Save Time with Optimized Client Folder Templates
Creating Folders, Lists, and Workflows from scratch for every new client is extremely time-consuming - especially as your agency grows. As you onboard clients at a faster rate, an inefficient onboarding process becomes a hindrance to productivity, taking your focus away from the real work.
Thankfully, ClickUp has extremely powerful template and duplication capabilities from the space level, all the way down to tasks and sub-tasks.
So how do we leverage this power? First, create a client folder template with lists to facilitate all possible client-centred workflows – all the workflows you can envision needing when managing your web development clients. It’s important to think across all current and possible future clients, scoping out the full range of flows we anticipate encountering. From there, optimize each of these through unique status options, custom fields, views, and automations. Then, include one-to-one mappings, programming in data-points in the backend for greater reporting and grouping capabilities. All that’s left is to add your sophisticated client dashboards that feed off of your client information to segment the data in insightful ways.
From there, it’s as simple as saving your ‘[Client Name]’ folder as a template to be recalled whenever a new client is won.
(Tip: Consider leaving a [Client Name] template folder in your sidebar for easy duplication rather than pulling templates from the template centre)
Backend Setup: Client Dropdowns and Relationship Fields
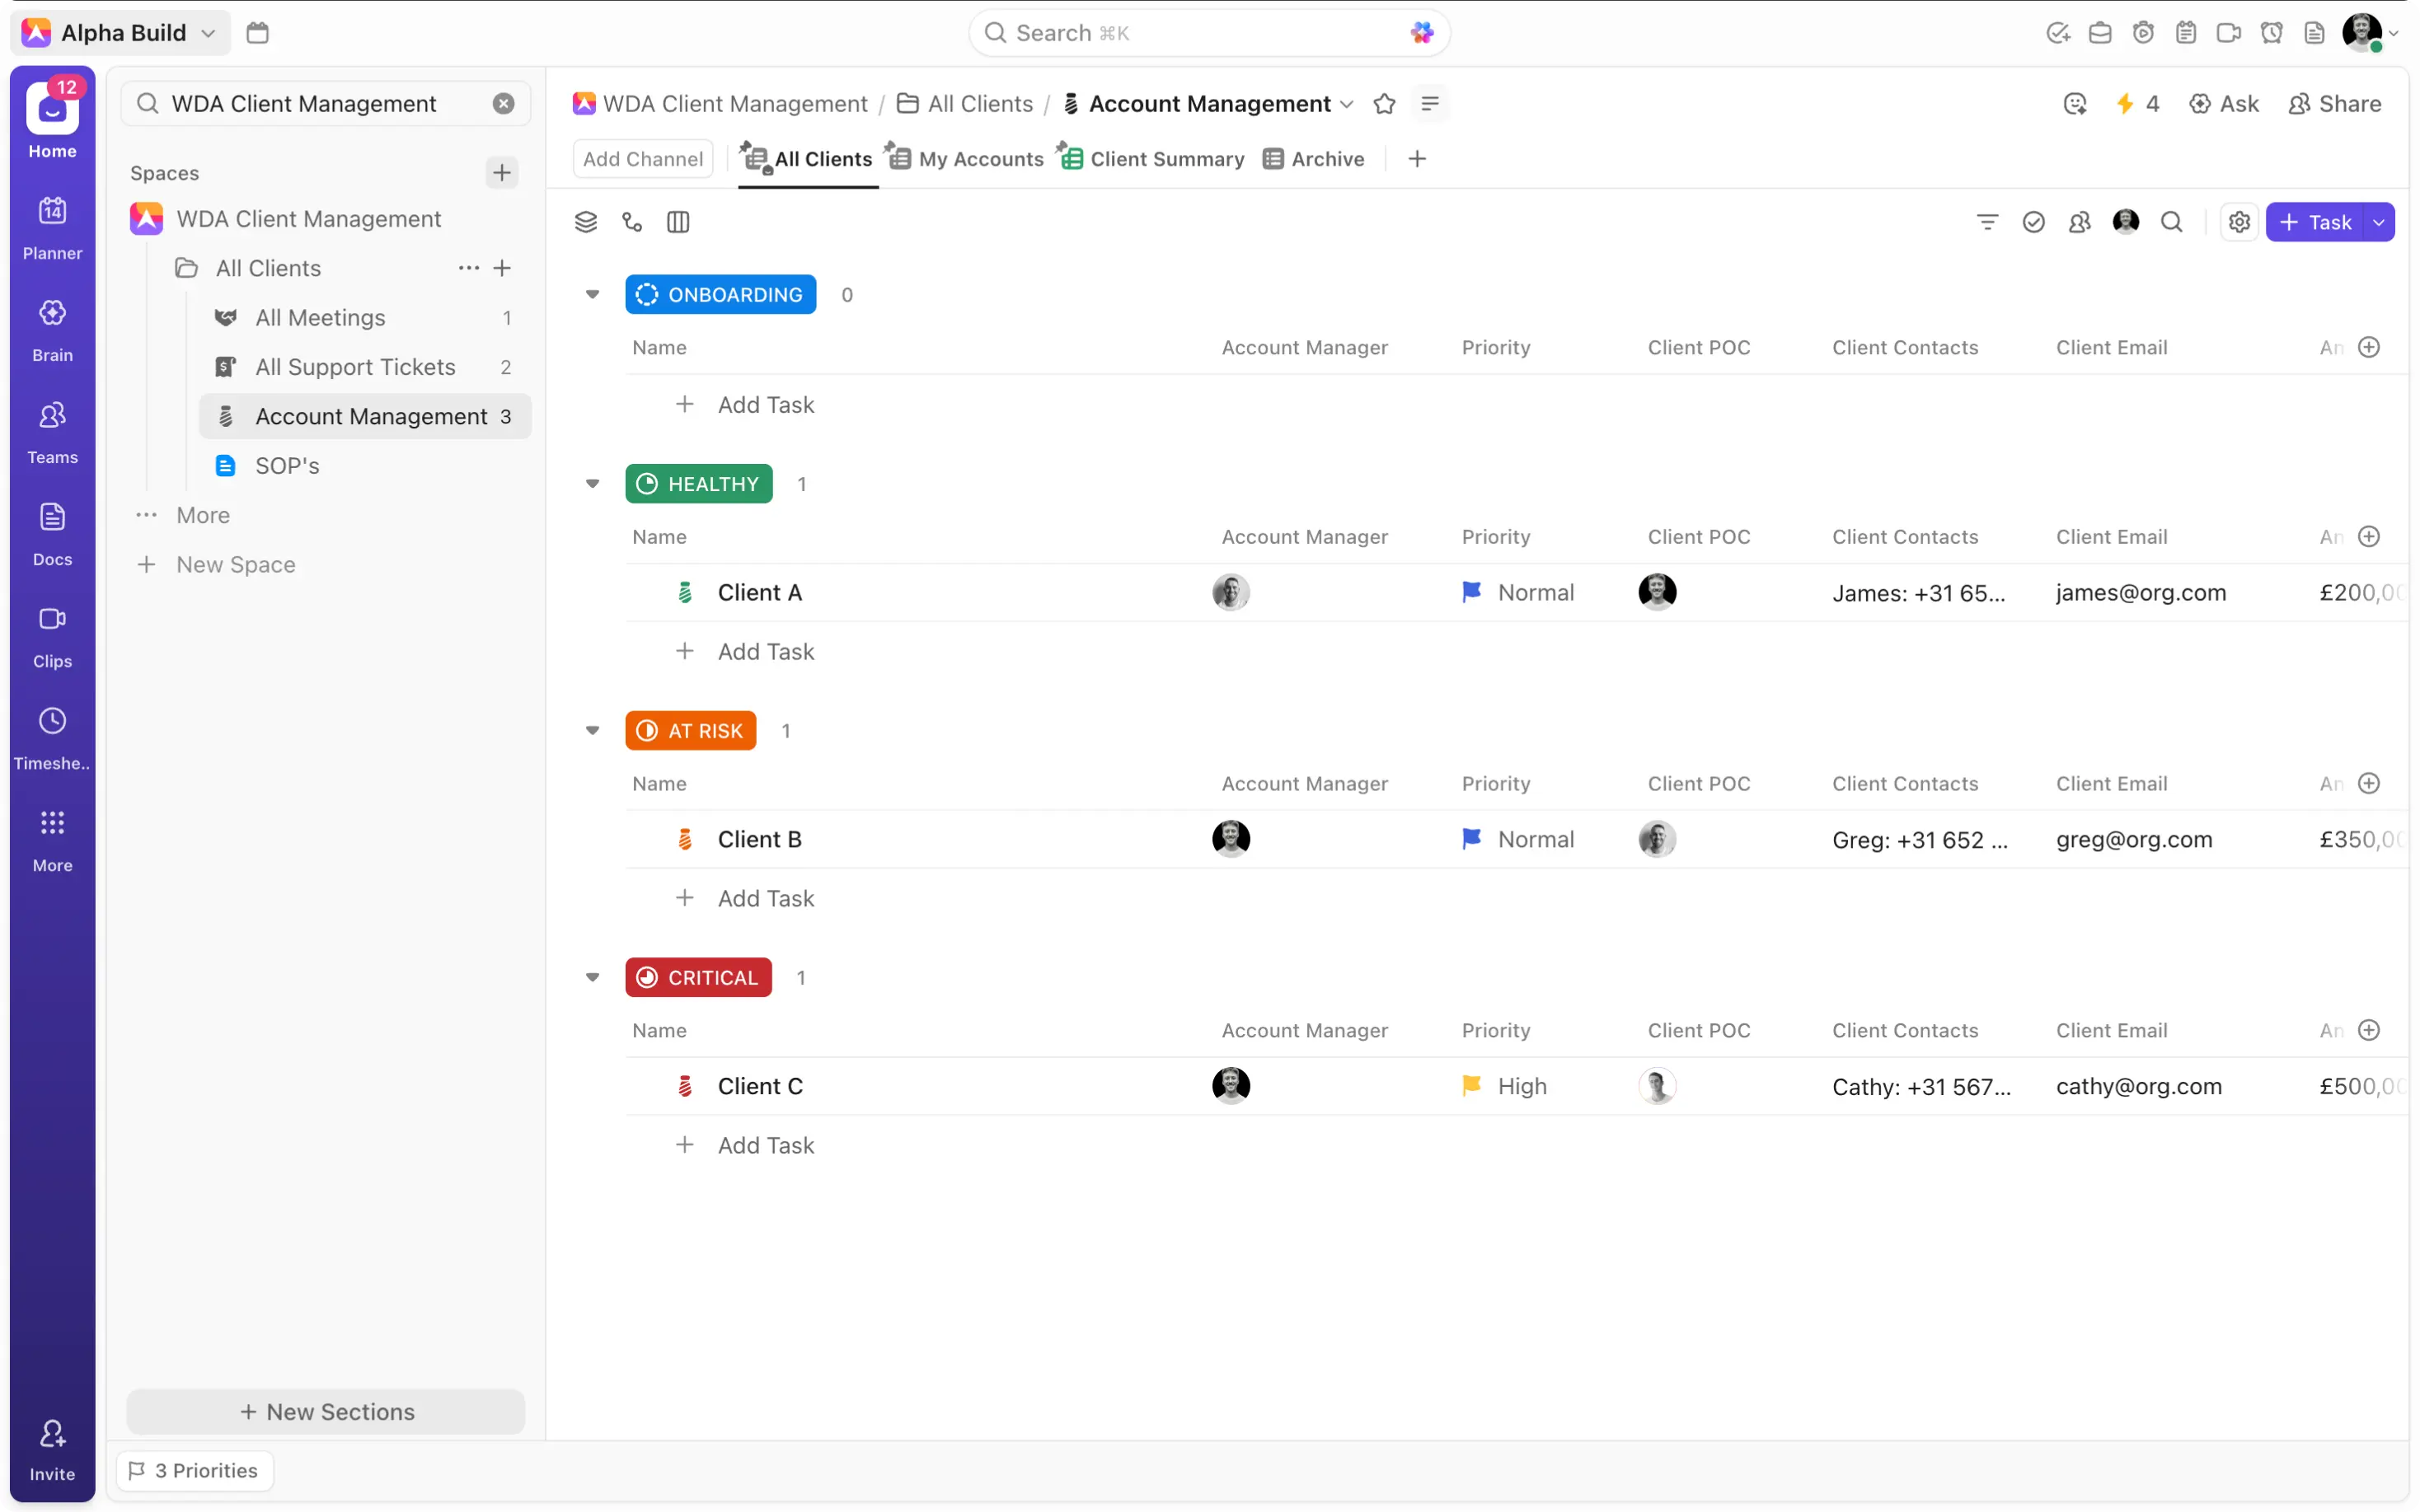
To gain cross-client visibility, set up a “Client” relationship field and “Client” dropdown. Pair this with an Account Management list (basic CRM) where each client is stored as a task with key fields like Account Manager, Health, and Value.
By attaching automations on our ‘[Client Name]’ folder, we can then ensure that all tasks and subtasks inherit a relationship to their corresponding client task. On the space level (and in our ‘All Client’ folder which we’ll dive into soon) we can group tasks by our ‘Client’ relationship – a beneficial feature for several reasons. Firstly, we can easily see what tasks relate to which client, gaining visibility on task load, impending due dates, and so on as they relate to each of our clients. Secondly, because these relationship groupings are dynamic, we get visibility on the status of our ‘Individual Client’ tasks by looking at the colour of the task type icon visible in the client groupings. Finally, these dynamic groupings allow you to go even further – click into each of your task groupings to be directed to the client task itself to access any important information on your client.
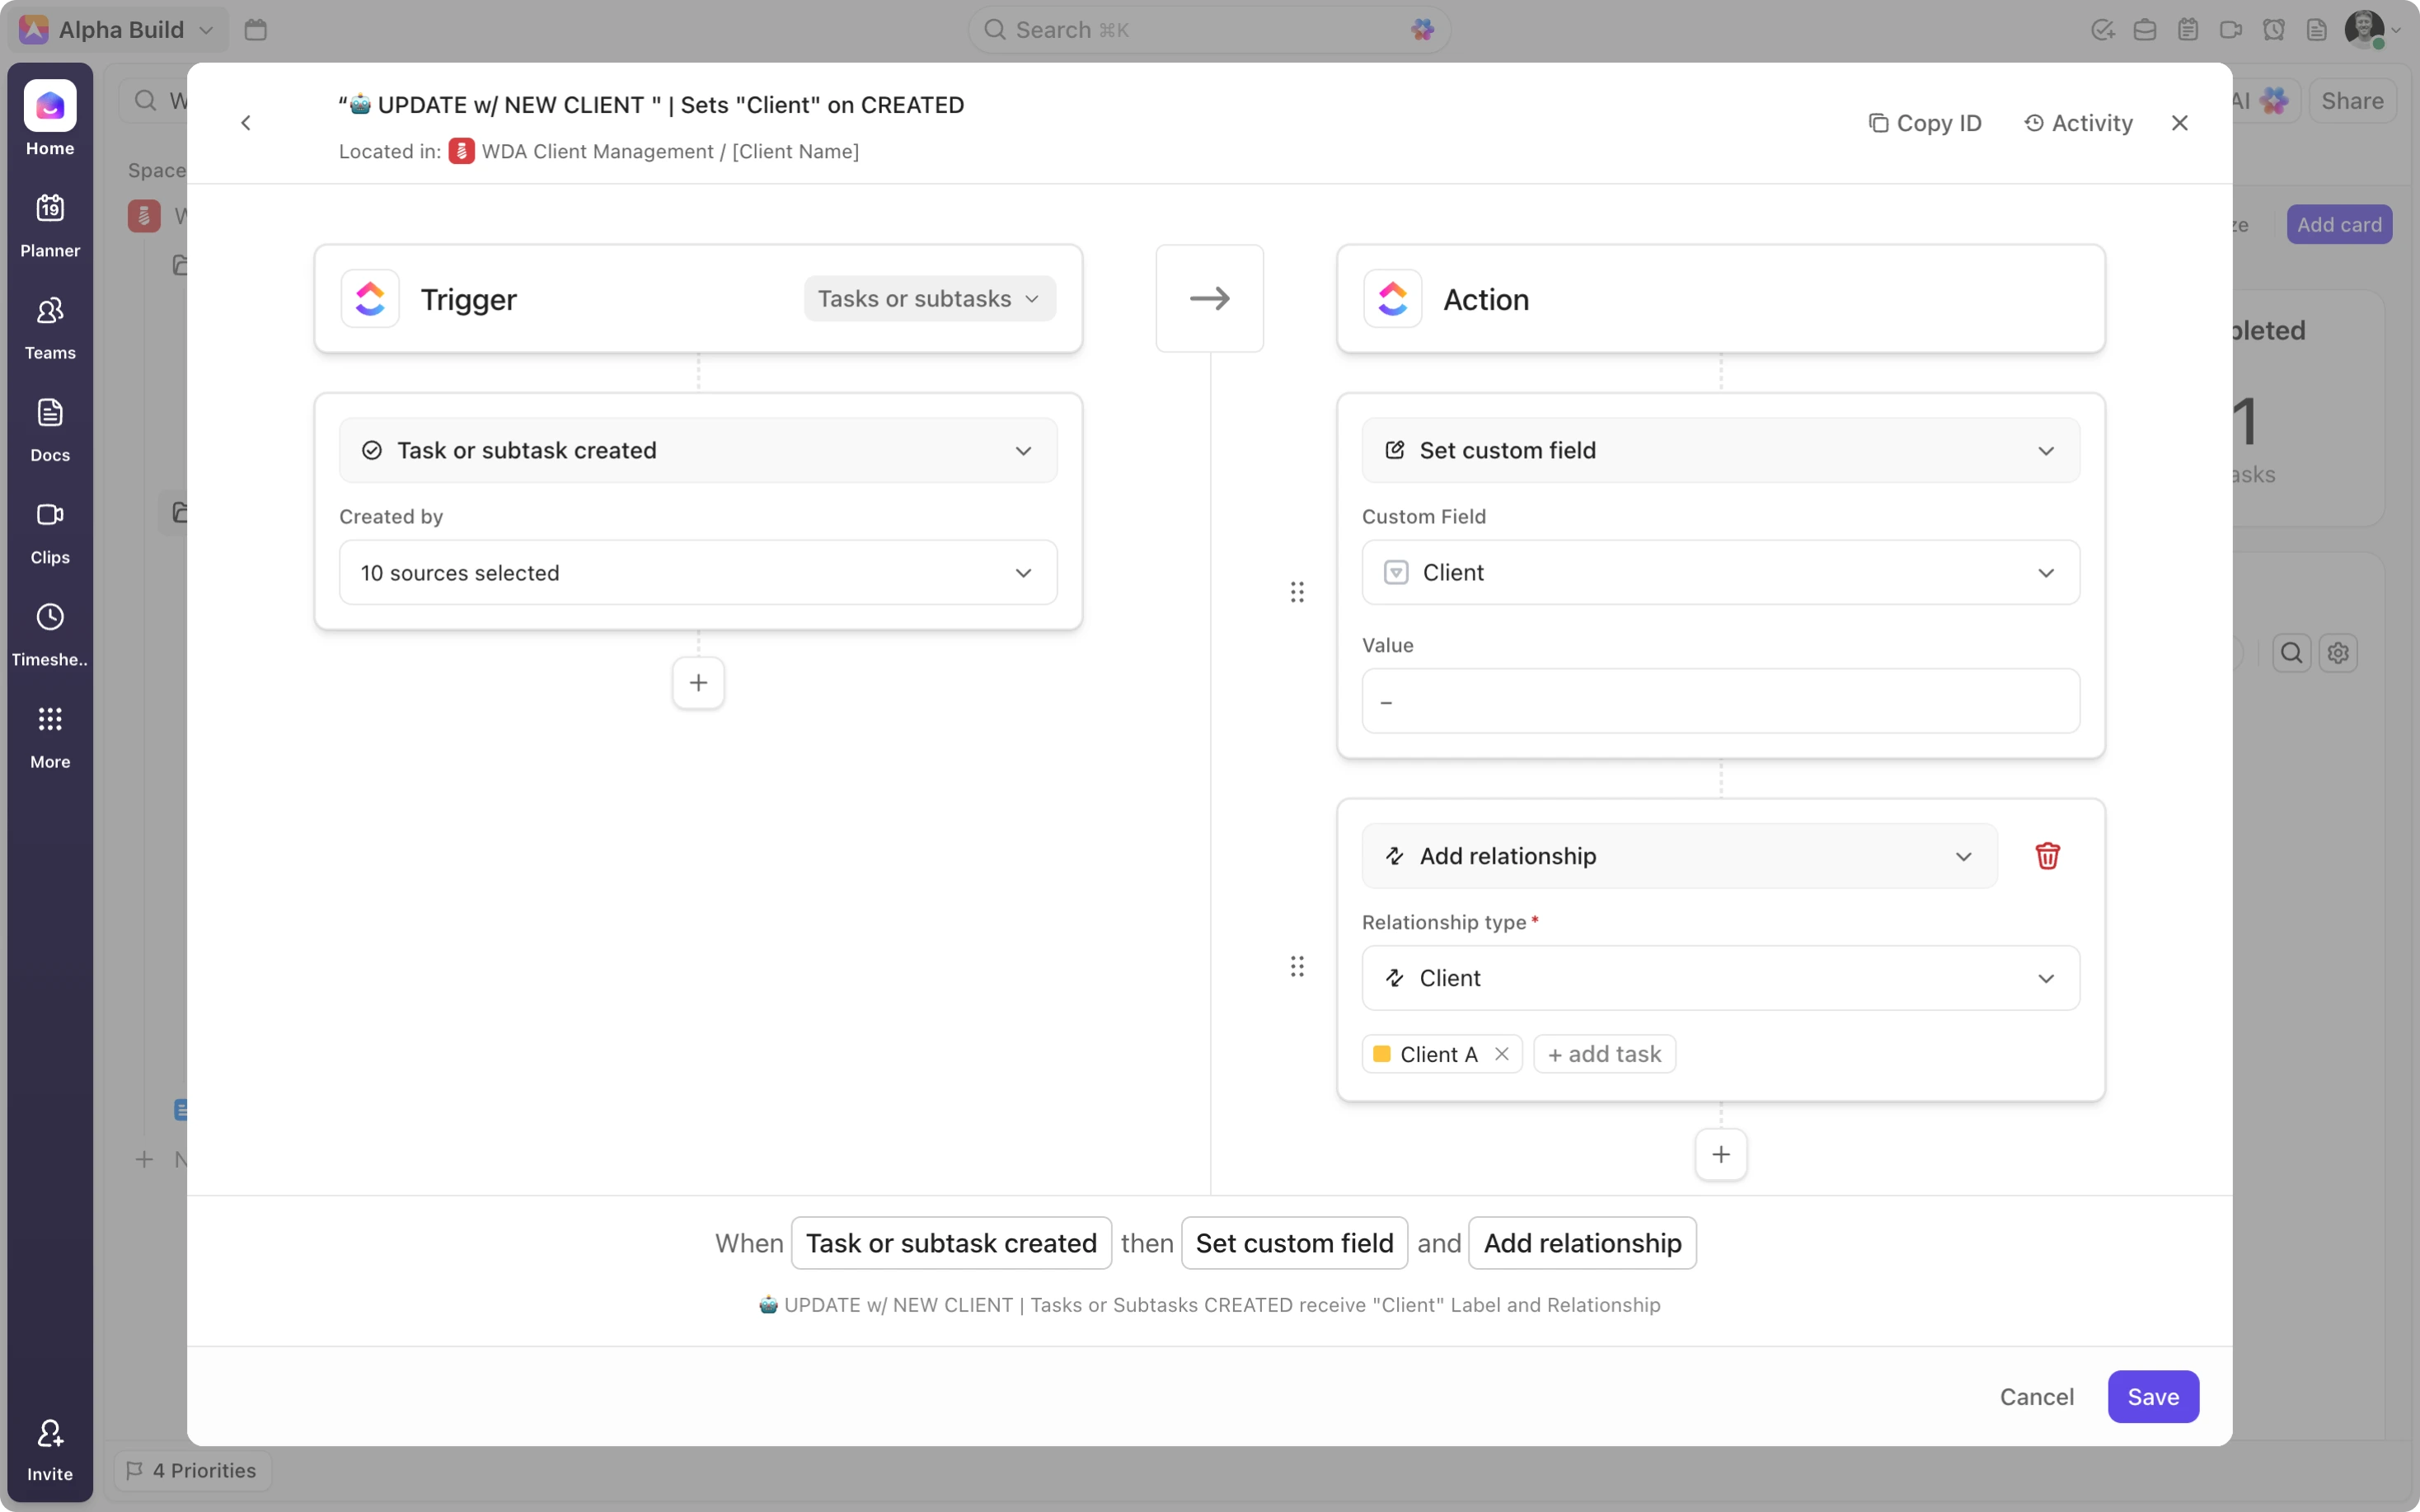
Relationship fields have limited dashboard functionality; however, you can create an additional ‘Client’ Dropdown field with the same set of client options and include it in the same folder-level automations to attach the correct client label to all of your client tasks. This will enable you to formulate powerful dashboard reports on your client space. Compare time tracking, task completion, delinquencies, and so on, by client to extract vital information.

The ‘All Clients’ Folder for Powerful Oversight
The ‘Client’ dropdown and relationship fields help segment your entire task load, so you can compare performance and progress across clients. Creating an ‘All Clients’ folder enables you to collate data into single locations for some of your most vital client management workflows.
You can think of the ‘All Clients’ folder as a data hub that serves to bring scattered client workflows into single lists for managerial oversight.
-
‘All Meetings’ - A consolidated log of every client meeting.
-
‘All Support Tickets’ - A single queue to manage requests across accounts.
-
‘Account Management’ - Your mini-CRM.
By creating powerful automations in your ‘[Client Name]’ folder, you can then ensure that tasks created in your ‘Meetings’ and ‘Support Tickets’ lists are added to the global ‘All Meetings’ and ‘All Support Tickets’ lists. As a result of your ‘[Client Name]’ folder back-end configuring, you know that these tasks will be fitted with their relevant labels and relationships. You can then group by ‘Client’ in these global lists if you want to maintain a client-centred view. Use these lists to schedule client meetings, track meeting outcomes across clients, and manage your entire support process.
The additional ‘Account Management’ list can be included to serve as the library for your ‘Client’ relationship field while also functioning as a basic CRM. Add fields like ‘Account Manager’, ‘Account Value’, ‘Account Health’, ‘Point of Contact’ etc. to store vital client data directly in ClickUp.